
If you see stains or drips under roof intersections, the most likely source is failing flashing. Contain the water, protect your belongings, and photograph everything, but stay off the roof. Then book an inspection with a licensed contractor whose DBPR license you have verified. Keep wind and flood coverage separate in your mind, because your insurer will.
TL;DR:
- Ceiling stains near walls, rings around vents, fireplace marks, and slope streaks can point to different flashing failures; water may travel along rafters before dripping.
- Stay off wet, steep, or high roofs; inspect from the ground or attic, photograph findings, and treat roof cement or flashing tape as temporary protection.
- Florida homeowners policies generally cover wind and hurricane damage unless excluded, but flood requires separate coverage, and insurers may treat leaks from ordinary wear differently.
- Verify a roofer’s license at MyFloridaLicense.com, ask who will obtain any required permit, and retain dated photographs, repair receipts, and insurer communications.
- Schedule roof inspections annually and after major storms, and clear gutters and valleys so debris does not hold water against flashing.
Table of Contents
- What causes roof flashing leaks in Florida?
- When should you hire a licensed roofer instead of handling it yourself?
- What can you safely check and temporarily fix before the pro arrives?
- What does a professional flashing inspection and repair involve?
- How do insurance claims and permits work for flashing leaks in Florida?
- How can you prevent flashing leaks on a Florida roof?
- Why we treat flashing as the first suspect
- Get your flashing leak inspected by our Tampa Bay team
- FAQ
- Sources
What causes roof flashing leaks in Florida?
Flashing is the thin metal (or sometimes membrane) material that seals the places where your roof changes direction or meets something else: walls, chimneys, vents, skylights, and valleys. Shingles and tile shed most of the water. Flashing handles the joints, which is exactly where water tries to get in.
Here are the types you will run into most often:
- Step flashing: Small bent pieces layered with each shingle course where a roof meets a sidewall.
- Drip edge: Metal along the eaves and rakes that directs water into the gutters and off the fascia.
- Chimney flashing: A combination of base flashing, counter flashing, and often a cricket (a small peaked diverter) behind the chimney.
- Pipe boots: Rubber or neoprene collars around plumbing vents, usually the first thing to crack in the sun.
- Valley flashing: Metal lining the channel where two roof slopes meet and carry heavy water flow.
Flashing fails for a handful of repeat reasons. Metal corrodes, sealant dries out and splits, and installers sometimes skip steps like lapping pieces correctly or tucking them under the water barrier. Shingles and tiles also shift over time, which pulls the surrounding flashing out of position. Wind can lift edges, and daily heating and cooling makes metal expand and contract until fasteners loosen.
Florida speeds all of this up. Intense UV exposure bakes rubber and sealant, salt air attacks metal near the coast, and summer storms drive rain sideways into joints that would stay dry in a gentle shower. A pipe boot that might last decades in a milder climate can crack far sooner under our sun, so treat age as a warning sign.
Interior clues help you map the problem. A stain on the ceiling near an exterior wall often points to sidewall or step flashing. A ring-shaped stain around a vent line suggests a failed pipe boot. A stain beside a fireplace points to chimney flashing, and a long streak running down a slope can mean a valley problem. In the attic, look for darkened decking, damp insulation, or rusty nail tips near these same spots. Keep in mind that water often travels along rafters before it drips, so the stain may sit several feet from the actual breach.
When should you hire a licensed roofer instead of handling it yourself?
Flashing sits at the most complicated points on your roof, and a small mistake there becomes a recurring leak. Call a professional when any of these apply:
- You have an active interior leak. Water reaching your ceiling means the roof assembly below the surface is already wet.
- The leak is large or keeps coming back. Repeated stains in the same spot mean a patch did not address the cause.
- You suspect decking or structural damage. Soft spots, sagging, or dark rot in the attic need a trained eye.
- The location is complicated. Chimneys, skylights, and roof-to-wall transitions demand correct layering.
- The roof is steep, wet, or high. No leak is worth a fall.
Licensing matters here. Use a licensed contractor for roofing work, and verify the contractor through the DBPR’s Trust But Verify guide. Warning signs include large upfront cash demands, refusal to pull permits, or a suggestion that you pull the permit yourself. The DBPR’s own Trust But Verify guide tells you to check any professional at MyFloridaLicense.com, and warns that unlicensed contractors may lack training and insurance.
For timing, expect the process to unfold in stages. A reputable contractor typically schedules an inspection first, follows with a written estimate, then arranges the repair once any permit and materials are in place. Urgent active leaks should get a temporary dry-in while permanent work is scheduled. After a major storm, demand is high, so verify licenses carefully instead of taking the first offer.
Pro Tip: Before the inspection, gather dated photos of the stain and its growth, a short timeline of when the leak appears (during wind-driven rain or any rain), and your roof’s approximate age. That information can shorten diagnosis.
What can you safely check and temporarily fix before the pro arrives?
Start with safety. If the roof is wet, steep, or high, do not climb it. You can learn a lot from the ground with binoculars and from inside the attic with a flashlight.
From outside, look for these signs:
- Rust streaks or flaking metal along flashing lines
- Gaps or lifted edges where the roof meets a wall
- Cracked or split rubber on pipe boots
- Loose, slipped, or missing shingles or tiles near a joint
- Dried, cracked sealant lines around chimneys and skylights
Photograph every finding from several angles and in daylight when possible. Wide shots show location, and close-ups show the damage itself.
Inside, check the attic during or right after rain if you can do so safely. Look for wet or compressed insulation, water trails on rafters, dark staining on the underside of the decking, and daylight coming through where it should not. Trace stains uphill, since water rarely drips straight below the opening. Place a bucket under active drips, move belongings, and puncture a bulging ceiling bubble in a controlled way over a container to relieve trapped water.
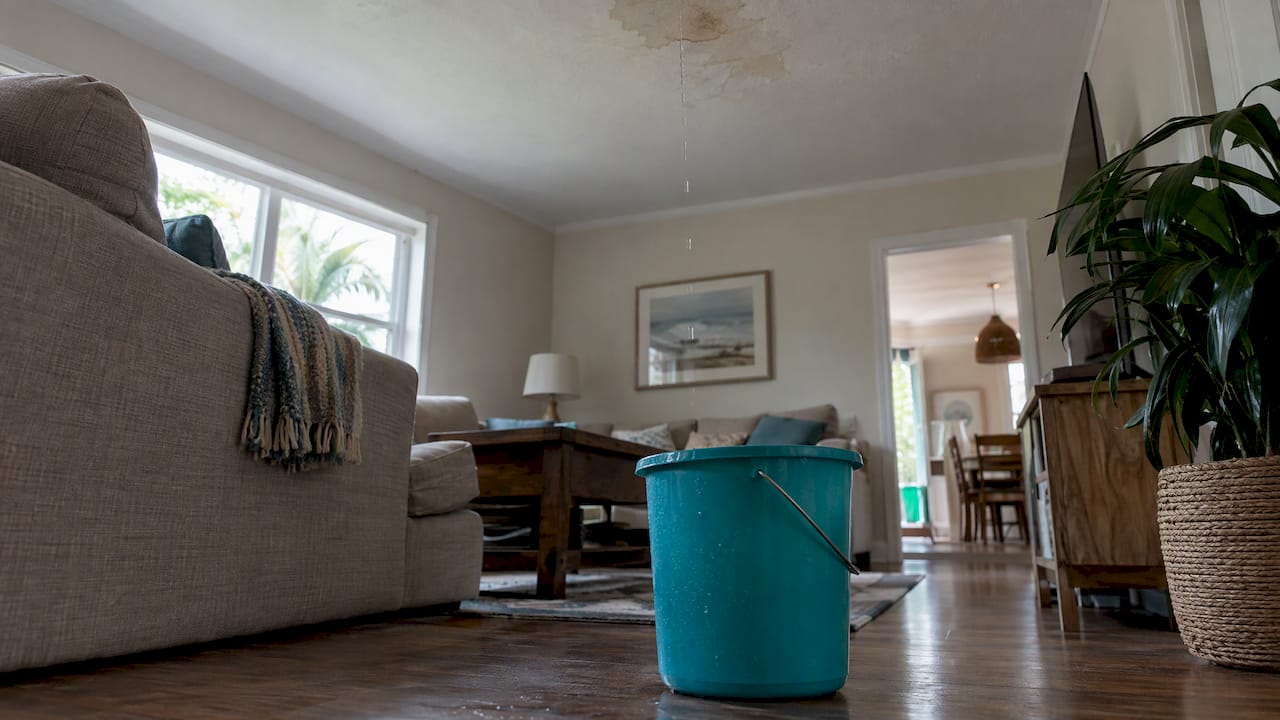
For short-term protection, a properly secured tarp is the safest outside measure, and it is best installed by a professional because roof access is the real danger. Roof cement or self-adhesive flashing tape can serve as a brief stopgap on a small, accessible crack, but these are temporary measures only. They do not replace flashing, and a patch layered on top of a failing joint can hide the problem while water keeps spreading underneath.
Documentation protects your claim. Date-stamp photos, write notes on what you saw and when, and keep every receipt for emergency materials or services. The Florida CFO’s natural disaster consumer guide tells homeowners to keep records of repairs, communications, and invoices.
Pro Tip: Take a video walking from the ceiling stain up into the attic to the suspected source. It gives your roofer and your insurer one continuous record of the damage path.
What does a professional flashing inspection and repair involve?
A thorough inspection works from the inside out. The roofer checks the attic for moisture patterns, then inspects the roof exterior by ladder or on the roof, and may use a drone for hard-to-reach areas. You should receive photographs of the problem areas and a written estimate describing the scope.
Repairs depend on what the inspection finds. Common options include:
- Re-sealing: Appropriate for minor sealant breakdown where metal and substrate are still sound.
- Replacing pipe boots: A routine fix when rubber collars have cracked.
- Re-installing step flashing: Lifting shingle courses and re-layering metal correctly along a wall.
- Re-seating shingles or tiles: Fixing displaced roofing that exposes the flashing below.
- Full flashing replacement: Needed when metal is corroded, undersized, or was never installed correctly.
Method matters as much as material. In coastal Florida, corrosion-resistant metals, correct underlayment, and sealants approved by the roofing manufacturer all help repairs last. A flashing fix is also a good moment to ask whether the surrounding roof is near the end of its life. If the roof is aging, our page on roof replacement explains when replacing makes more sense than repeated repairs, and our article on when a roof needs full replacement goes deeper.
Questions worth asking any contractor:
- Is the work covered by a written warranty, and for how long?
- Who pulls the permit, and is it included?
- What is the realistic timeline, including weather delays?
- Can you provide local references and a license number to verify?
A contractor who answers these clearly is usually one who has done the work many times. You can also read about three roofing problems professionals can identify during an inspection to see what else a trained inspector looks for beyond the leak itself.
How do insurance claims and permits work for flashing leaks in Florida?
Coverage type decides everything, so sort that out first. Under Florida’s statute on windstorm coverage, standard homeowners policies generally include windstorm and hurricane coverage unless the policyholder has signed a statement excluding it, while flood damage requires a separate policy through NFIP or a private insurer.
Homeowners’ policies generally cover wind and hurricane damage unless excluded, while flood is typically insured separately. The Florida CFO’s homeowners insurance toolkit also notes that new NFIP flood policies typically carry a 30-day waiting period, so do not wait for a storm to buy.
A flashing leak from wear and tear is often treated differently than storm-caused damage, so ask your insurer how your policy classifies it. Follow these steps:
- Notify your insurer and get a claim number.
- Document the damage with dated photos and notes before any cleanup.
- Make reasonable temporary repairs and keep every receipt.
- Expect an adjuster. The field adjuster may not go onto the roof, so your own photos and a roofer’s report matter.
- Keep a communication log of calls, emails, and invoices.
On permits and licensing, verify your contractor at MyFloridaLicense.com before signing. Be cautious of anyone who solicits storm claims door to door or wants cash only. Florida’s post-storm insurance guidance discusses cancellation rights for roofing contracts. Check the guidance and your contract for the applicable terms. Whether a repair needs a permit depends on its scope and your local building department, so ask your contractor to confirm and handle it.
How can you prevent flashing leaks on a Florida roof?
Prevention is mostly about looking early and acting small. Plan on an annual inspection plus a check after every major storm, since wind can loosen flashing without producing an obvious leak.
Work through this maintenance list:
- Clean gutters and valleys so debris does not hold water against flashing.
- Replace dried or cracked sealant before gaps open.
- Trim tree limbs that scrape the roof or drop debris.
- Re-seat loose shingles or tiles before they expose the metal underneath.
- Replace cracked pipe boots at the first sign of splitting.
- Look for rust streaks after humid summer months, especially near the coast.
If you are replacing flashing or the roof, ask for corrosion-resistant metal and quality underlayment, since salt air and sun are the main enemies here. A professional preventive check is worth scheduling if your roof is more than a few years old, if you have a chimney or skylight, or if you have never had the flashing examined. Our roof inspection service covers these details.
Why we treat flashing as the first suspect
At Coastal Roofing & Construction, we have spent our time on Tampa Bay roofs, and the pattern repeats: the leak homeowners notice inside is rarely where the problem sits outside. We start with the attic, trace the water path, and only then climb up to confirm the source. Guessing at the surface is how patches fail.
Our team holds manufacturer certifications with Owens Corning, GAF, and Tri County Metals, and every repair we do is licensed and insured. When you book an inspection with us, we assess the problem and discuss what we find. We also tell you when a repair will do and when it will not, because a flashing fix on a roof that has run its course just delays a bigger bill. My strongest opinion on this topic: the expensive mistake is not the leak, it is the cheap cover-up that lets moisture keep working behind the scenes for another season.
— Ryan
Get your flashing leak inspected by our Tampa Bay team

If water is showing up near a chimney, vent, wall, or valley, we can find the source and fix it right. Here is what we offer:
- Roof inspections
- Flashing and roof repair
- Storm damage restoration
- Roof replacement when repair no longer makes sense
We serve Pinellas, Hillsborough, and Pasco counties, including Clearwater, St. Petersburg, Tampa, Largo, Brandon, Palm Harbor, and nearby Gulf Coast communities. A booked inspection brings our licensed team to assess the problem areas. Current pricing details are on our website.
Ready for a clear answer? Request an inspection or repair estimate and we will schedule your visit.
FAQ
Can you do your own roof in Florida?
For roof repairs and installations, consider using a licensed contractor and verify the professional through the DBPR’s Trust But Verify guide. Homeowners can inspect from the ground and do safe temporary measures, but permanent flashing work belongs to a licensed professional.
How much does roof flashing cost?
Cost depends on the type of flashing, the roof’s height and complexity, and how much surrounding roofing must be removed. Current pricing details are on our website.
Are roof leaks covered by home insurance?
Homeowners policies in Florida generally cover wind and hurricane damage unless the policyholder has excluded it, while flood needs separate coverage, per Florida’s windstorm coverage statute. Wear-related leaks may be treated differently, so check how your insurer classifies the cause.
Where is flashing needed on a roof?
Flashing belongs wherever a roof meets another surface or changes direction: chimneys, skylights, vent pipes, sidewalls, valleys, and roof edges. These joints are where water is most likely to get past the main roofing material.
How can you verify a roofing contractor in Florida?
Search the contractor’s name or license number at MyFloridaLicense.com. The DBPR’s Trust But Verify guide recommends this check, since unlicensed contractors may lack training and insurance.