
Every attic ventilation system needs two things working together: intake vents that pull cool air in low, and exhaust vents that let hot, moist air escape up high. For most homes, the most reliable setup is a continuous ridge vent paired with continuous soffit intake — no moving parts, no electricity, and it works as long as the soffits stay open and the ridge run is long enough.
Here’s the lineup you’ll actually encounter on a roof inspection:
- Soffit vents (intake, installed under the eaves)
- Ridge vents (exhaust, running the length of the roof peak)
- Box or louver vents (exhaust, static units set into the roof field)
- Turbine vents (exhaust, wind-driven spinners)
- Powered vents (exhaust, electric or solar-driven fans)
- Gable vents (exhaust, mounted in the end walls)
Key Takeaways
Balanced attic ventilation depends on matching intake NFVA to exhaust NFVA, sized to the 1/300 rule, with continuous ridge and soffit venting as the default for most roofs.
| Point | Details |
|---|---|
| Match intake to exhaust | Soffit intake NFVA should equal or exceed ridge and other exhaust NFVA to avoid starving the system. |
| Use the 1/300 rule | Provide 1 square foot of NFVA per 300 square feet of attic floor area, split between intake and exhaust. |
| Blocked soffits cause most failures | Insulation or paint blocking soffit vents is the most common reason ventilation underperforms. |
| Add power only when justified | Powered fans need matching intake capacity or they risk pulling conditioned air from the living space. |
| Get a professional NFVA check | Coastal Roofing & Construction inspects intake and exhaust balance and provides a written ventilation plan during roof replacement quotes. |
Table of Contents
- Intake vs. Exhaust: Why Both Sides Have to Match
- Types of Roof Ventilation: A Practical Comparison
- How Much Ventilation Your Attic Actually Needs
- Choosing the Right Vents for Your Roof
- Warning Signs Your Attic Isn’t Venting Right
- What a Licensed Roofer Checks During a Ventilation Inspection
- An Editorial Take on Ventilation Advice
- Get Your Attic Ventilation Checked by a Local Roofing Team
- Sources
Intake vs. Exhaust: Why Both Sides Have to Match
Attic ventilation runs on a simple principle: cool air enters low, heats up, and rises out high. That rising motion is called the stack effect, and wind passing over the roof gives it an extra push through what’s known as the Venturi effect. Intake vents sit at the eaves or soffits and pull in fresh outside air. Exhaust vents sit near the ridge, on hips, or scattered across the roof field, and let the hot, humid air out.
The system only works when both sides are sized correctly. Here’s what typically goes wrong:
- Soffits get blocked. Insulation, paint, or old screen material chokes off the intake path, and no amount of exhaust venting can fix a starved intake.
- Exhaust outpaces intake. A roof with generous ridge venting but pinched or painted-shut soffits can’t pull enough replacement air, so the system stalls.
- Multiple exhaust types compete. Running a powered fan alongside a ridge vent often pulls air from the nearest opening, which is sometimes the ridge vent itself rather than the soffits.
Pro Tip: Walk your attic on a bright day. If you can see daylight coming through the soffit vents from inside, your intake path is clear. If it’s dark and stuffy even near the eaves, insulation is probably blocking the air.
Intake is usually the weaker link, not exhaust. Homeowners add ridge vents, powered fans, or extra box vents assuming more exhaust solves overheating, when the soffits were never delivering enough air to begin with.
Types of Roof Ventilation: A Practical Comparison
Here’s what each vent type actually does, what it costs you in maintenance, and where it earns its place on a roof.
Soffit vents (continuous or individual). These are your intake workhorses, mounted along the underside of the eaves. Continuous soffit strips deliver steady airflow along the whole roof edge; individual round or rectangular vents work on homes with narrower overhangs. Either way, they need rafter baffles installed before insulation goes in, or blown-in fiberglass will bury them within a few years.
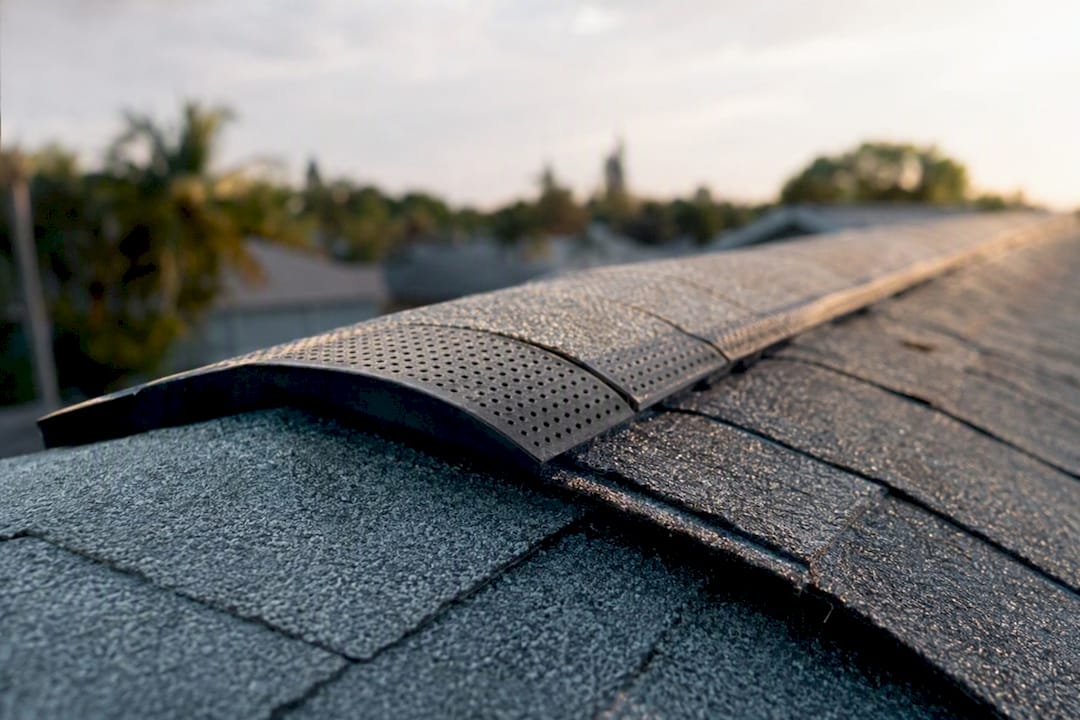
Ridge vents. A continuous ridge vent runs the length of the roof peak and typically provides 12 to 18 square inches of NFVA per linear foot. It’s low profile, has no moving parts, and pairs naturally with soffit intake because both run continuously along matching lines. The tradeoff is that a short or broken-up ridge line limits how much exhaust you can install this way.
Static box or louver vents. These individual units, each rated between 18 and 60 square inches of NFVA, get scattered across the roof field when there’s no continuous ridge to work with. They’re simple and cheap, but every unit is a roof penetration, and penetrations are where leaks eventually start if flashing isn’t done right.
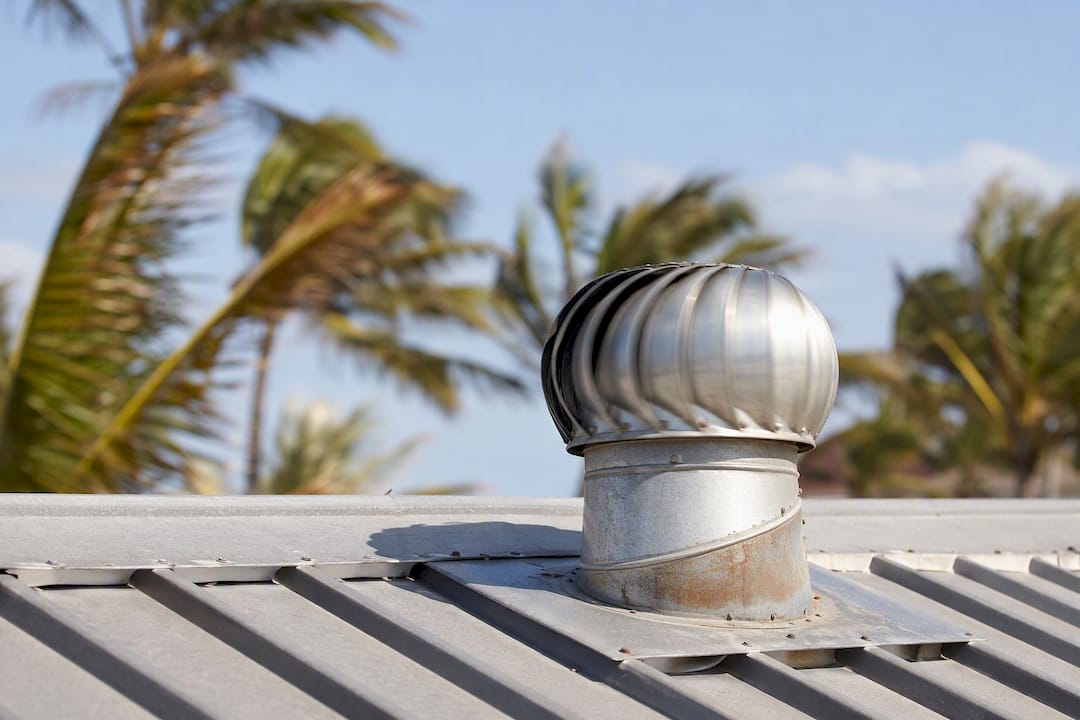
Turbine vents. Wind spins the blades and pulls air out. On breezy sites, a single turbine can move air equivalent to several static vents, rated at roughly 50 square inches of NFVA per 12-inch unit. The catch: turbines perform poorly in still air, and the bearings wear out over time, so they work best as a supplement for hot spots rather than the primary exhaust.
Powered attic fans (electric and solar). These are rated by airflow rather than NFVA, typically 500 to 1,600 CFM. They move a lot of air fast, which sounds like an upgrade until you realize a fan that size needs matching intake capacity to avoid pulling conditioned air up from your living space through ceiling gaps. Manufacturers themselves warn that undersized intake turns a powered fan into an energy drain instead of a fix.
Gable and specialty vents. Gable vents sit high in the end walls and can move real volume, but they compete with ridge vents for the same rising air and often short-circuit a ridge/soffit system rather than helping it. Hip vents and roof-to-wall vents fill gaps on complex roofs where a continuous ridge isn’t possible, but they’re a workaround, not a first choice.
How Much Ventilation Your Attic Actually Needs
Static vents get rated by Net Free Vent Area, the actual open area air can pass through, measured in square inches. Powered fans get rated by CFM, cubic feet of air moved per minute. You can’t compare the two directly, which is exactly why so many homeowners end up mixing systems that don’t talk to each other.
Sizing itself follows one long-standing formula. The 1/300 rule calls for at least 1 square foot of NFVA for every 300 square feet of attic floor area, split roughly evenly between intake and exhaust.
Here’s the math on a typical home:
- Measure the attic floor area. A 2,000 square foot attic needs 2,000 ÷ 300 = 6.67 square feet of total NFVA, or about 960 square inches.
- Split that total evenly between intake and exhaust to achieve balanced ventilation.
- Add up the actual NFVA ratings printed on the vent products you’re considering. Don’t eyeball vent size and guess — a continuous ridge vent rated at 15 square inches per linear foot needs 32 linear feet to hit 480 square inches.
If your soffits can’t physically fit enough continuous venting to hit that intake number, that’s the signal to look at supplemental intake vents before adding any more exhaust.
Choosing the Right Vents for Your Roof
Start with roof geometry. A long, continuous ridge with open, unobstructed soffits almost always points to ridge-plus-soffit venting. It’s the setup with the fewest moving parts, the least maintenance, and the best track record across shingle, tile, and metal roofs alike.
If your roof has a hip design, dormers, or a ridge too short to carry enough NFVA, static box vents or hip vents fill the gap. High wind exposure makes turbines worth a look for isolated hot zones, but skip them as a primary system if your site sits in still air most of the year.
Watch for these installation red flags:
- Soffit vents painted over or physically blocked by insulation
- Two or more competing high-exhaust types installed on the same roof
- Powered fans installed with no intake upgrade to match
- No baffles where insulation meets the eaves
Pro Tip: If a contractor proposes adding a powered fan without first checking your existing intake NFVA, get a second opinion. Fixing intake almost always costs less than running a fan that’s fighting a losing battle.
Warning Signs Your Attic Isn’t Venting Right
An attic running far hotter than the outside air, shingles curling or losing granules early, or a musty smell when you open the attic hatch all point to airflow problems. So does frost or dark staining on the roof sheathing in winter.
Here’s how to check it yourself before calling anyone:
- Look at your soffits from outside. If they’re painted shut or covered by gutter guards, air isn’t getting in.
- Check the attic for visible insulation piled against the eaves, which blocks the same intake path from the inside.
- Look for ice buildup at the roof edge in winter, a classic sign of heat escaping the living space rather than a venting problem alone. Poor air sealing between living space and attic causes most ice dams, even on a well-vented roof.
Call a roofer when you see moisture staining on the decking, recurring ice dams despite clear vents, a roof geometry too complex to size yourself, or when you’re already planning a reroof and want the ventilation fixed at the same time.
What a Licensed Roofer Checks During a Ventilation Inspection
A proper inspection starts with measuring your attic floor area and tallying existing NFVA against the 1/300 rule, then a visual and thermal check for hot spots, blocked baffles, and insulation encroachment.
Typical fixes include:
- Adding continuous soffit strips where none exist
- Installing or extending a continuous ridge vent
- Placing rafter baffles at every eave before re-insulating
- Air sealing gaps between the living space and attic
- Adding a powered vent only when intake capacity genuinely justifies it
Coastal Roofing & Construction’s crews are manufacturer-certified through Owens Corning, GAF, and Tri County Metals, which matters here because ventilation specs vary by roofing system and warranty terms often depend on installing them correctly.
Ask any contractor proposing ventilation changes for the actual NFVA numbers, before-and-after photos, and a written plan showing intake and exhaust totals. If they can’t produce that, they’re guessing.
An Editorial Take on Ventilation Advice
Most ventilation advice online focuses on exhaust: which vent moves the most air, which one looks best, which one a manufacturer is pushing hardest. That’s backward. The soffit intake is where these systems actually fail in the field, and it’s the part nobody photographs for a sales brochure.
The conventional wisdom to “add a powered fan for hot attics” deserves more skepticism than it gets. A fan is a bandage on a problem that’s usually intake capacity, not lack of exhaust horsepower. Before spending money on anything with a motor or a solar panel, get the soffit and ridge math right. Roof geometry, not brand preference, should drive the decision: a long continuous ridge with clear soffits wins on cost, durability, and simplicity almost every time it’s physically possible.
What the reader should prioritize first is measurement, not shopping. Know your attic square footage, know your existing NFVA, and only then decide whether you need a different vent type or just need the existing ones unblocked.
Get Your Attic Ventilation Checked by a Local Roofing Team
Coastal Roofing & Construction gives Tampa Bay homeowners something a generic handyman quote won’t: manufacturer-certified crews who can size your ventilation correctly against actual NFVA specs instead of guessing from the ground.

If your attic runs hot, your soffits look blocked, or you’re planning a reroof and want the airflow fixed at the same time, a proper inspection settles it fast. Our team checks intake and exhaust balance as part of every residential roof replacement we quote in Pinellas, Hillsborough, and Pasco counties. Browse recent projects in our portfolio to see the workmanship, then request an inspection to get a written ventilation plan for your specific roof.
Sources
- Attic Ventilation 101 — IIBEC
- Calculating attic passive ventilation — BASC / PNNL
- About attic ventilation — ENERGY STAR