
A storm damage roof inspection checklist is a structured tool homeowners use to systematically assess roof condition after severe weather, document findings for insurance, and determine whether repairs or full replacement are needed. Known in the industry as a post-storm roof assessment, this process covers everything from missing shingles and granule loss to interior water intrusion and structural compromise. Florida homeowners face this reality regularly. The Tampa Bay area sits in one of the most active hurricane corridors in the country, and every major storm creates the same urgent question: how bad is the damage, and what do you do next? This guide answers both.
1. What are the key exterior roof damage signs to check after a storm?
The exterior inspection is the first step in any post-storm roof assessment, and it starts from the ground. Experts recommend against climbing on the roof yourself. The risk of injury is real, and walking on a storm-weakened roof can cause additional damage that complicates your insurance claim.
From the ground and the roof perimeter, look for these signs:
- Missing, lifted, or curled shingles. Wind pulls shingles from the edges and ridges first. Even one missing shingle exposes the roof deck to water intrusion.
- Granule loss in gutters and downspouts. Asphalt shingles shed granules under hail impact. Heavy granule accumulation in gutters after a storm signals accelerated shingle wear.
- Dents or cracks on gutters, metal flashing, and vents. Hail leaves circular dents on soft metal. Damaged flashing around chimneys, skylights, and pipe boots is a direct path for leaks.
- Damaged soffits, fascia, and ridge caps. Wind-driven rain attacks these edges. Cracked or missing ridge caps leave the roof’s peak exposed.
- Debris accumulation. Branches, leaves, and other debris trap moisture and can puncture membrane layers on flat roofs.
- Damage to outdoor property. Dented AC units, damaged fencing, or cracked patio covers all serve as supporting evidence that a significant storm event occurred.
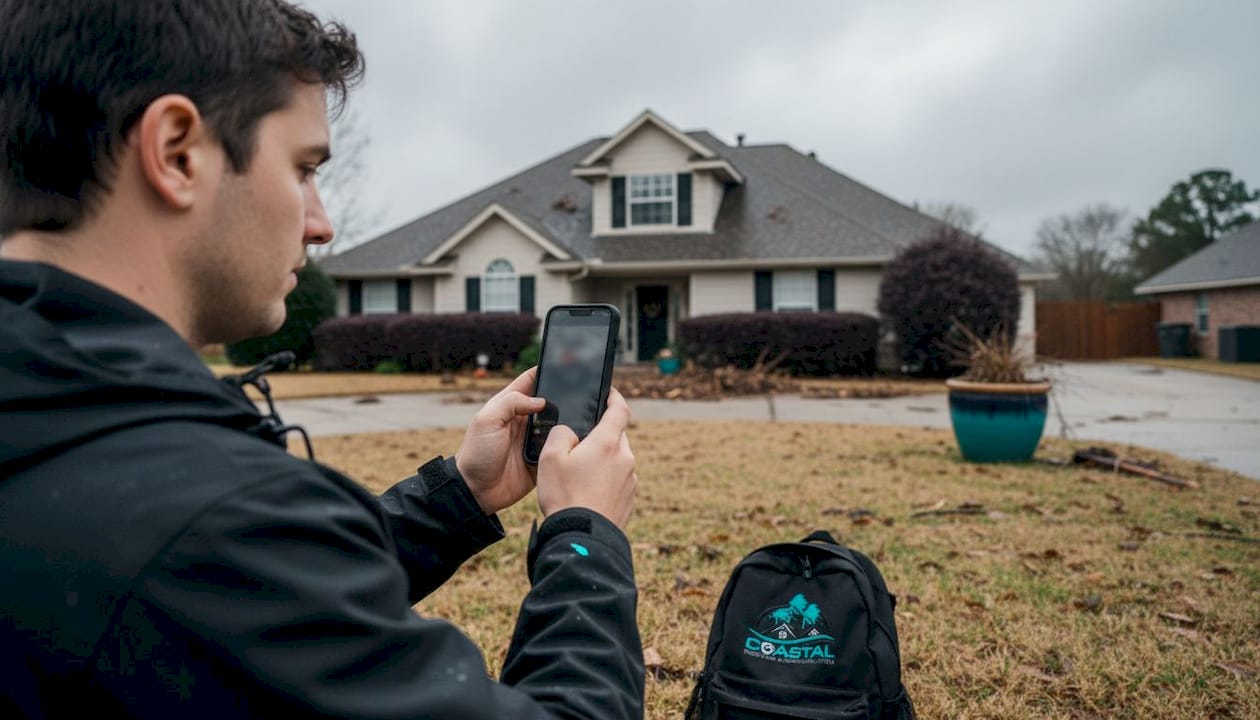
Pro Tip: Walk the full perimeter of your home with your phone camera. Shoot from multiple angles. Wide shots establish context; close-ups capture specific damage. Both matter when your adjuster reviews the claim.
Understanding common wind damage patterns helps you know exactly where to look and what to photograph first.
2. How to identify interior roof damage signs after a storm
Interior damage is often the most overlooked part of a post-storm roof assessment. Many homeowners assume that if the ceiling looks fine, the roof is fine. That assumption costs money.
Check these areas inside your home:
- Ceiling stains and discoloration. Yellow or brown rings on drywall indicate water has already penetrated the roof system. The stain location does not always match the leak source above it.
- Active dripping or pooling water. Place buckets and mark the location. This is your most urgent documentation priority.
- Musty or mildew odors. Moisture trapped in insulation or between layers creates odor before it creates visible staining.
- Light penetration in the attic. On a sunny day, enter the attic and look for pinpoints of daylight through the roof deck. Any light means a gap exists.
- Wet or damp attic insulation. Press your hand against the insulation near the ridge and eaves. Wet insulation loses its thermal value and promotes mold growth within 24–48 hours.
Interior storm damage such as attic stains and moisture can appear days or weeks after the event. That delayed appearance is why a single inspection is never enough.
Pro Tip: Run a second interior check after the next rainfall. Water follows the path of least resistance, and a new rain event often reveals leaks that were invisible during your initial walkthrough.
3. What steps to take immediately after discovering storm damage
Speed and documentation are the two factors that most determine whether your insurance claim succeeds. The sequence matters as much as the actions themselves.
- Document everything before touching anything. Take date-stamped photos and videos of all damage, both exterior and interior. Capture wide establishing shots and tight close-ups of each damaged area.
- Record storm event data. Note the exact date and time of the storm. Cross-reference with the National Weather Service or NOAA records for your zip code. Storm date credibility directly impacts claim acceptance. Insurance carriers verify weather data independently, and a mismatch between your claim date and official records can trigger a denial.
- File your First Notice of Loss before calling contractors. File the FNOL first to enter the insurance claim queue immediately, then engage roofing professionals for estimates. Reversing this order can complicate your claim timeline.
- Make temporary repairs to prevent further damage. Tarping active leaks is both your right and your responsibility under most homeowner policies. Temporary mitigation costs are reimbursable when you save receipts and document the work with photos.
- File your full claim promptly. Insurance policies typically require filing within 30–60 days of discovering damage. Filing within 24–48 hours of the event is the stronger move. Delays give carriers grounds to question whether the damage is storm-related.
- Review your policy details now. Locate your deductible amount, check for “named storm” clauses, and confirm whether your policy covers replacement cost value or actual cash value. Wind and hail deductibles commonly run 1%–2% of your home’s insured value, which affects your out-of-pocket exposure.
4. How to work effectively with insurance adjusters and roofing professionals
The adjuster inspection is the moment your claim is won or lost. Most homeowners treat it as a passive event. It is not.
- Be present for the adjuster’s visit. Walk the property with the adjuster. Point out every item you documented. An adjuster who inspects alone may miss damage that is obvious to a trained eye.
- Bring a roofing contractor with you. Having a contractor present during the adjuster inspection helps ensure all damage is accurately identified and recorded. This prevents low settlement offers before they happen.
- Understand how adjusters estimate. Many adjusters use Xactimate, an industry-standard estimating platform. Contractors who know Xactimate line items can identify when damage is under-scoped or priced below current material costs.
- Compare estimates independently. Get a written estimate from a licensed roofing contractor and compare it line by line against the adjuster’s scope of loss. Gaps between the two are common and negotiable.
- Submit supplements for missed damage. A supplement is a formal request to add items the adjuster missed or undervalued. Submit supplements with photos, contractor estimates, and any relevant weather documentation.
- Track every communication. Log dates, names, and summaries of every call and email with your insurer. This record protects you if the claim is disputed or delayed.
- Know your state’s deadlines. Florida has specific prompt notice requirements and statutes of limitations for insurance claims. Missing a deadline can forfeit your right to supplement or appeal.
Most insurance carriers must acknowledge claims within 15 days and make an initial decision within 30–45 days. Disputed claims can extend well beyond six months. Staying organized from day one shortens that timeline.
The role of professional inspectors in this process goes beyond finding damage. A thorough written report from a licensed contractor gives your claim documentation that an adjuster’s quick walkthrough rarely produces.
5. Advanced tips and common pitfalls to avoid after a storm
Most homeowner mistakes during the post-storm process are avoidable. Knowing them in advance changes the outcome.
- Never climb on the roof yourself. Ground-level, perimeter, and attic inspections give you the documentation you need. A licensed roofer carries the insurance and equipment to inspect safely.
- Keep all weather data. Download and save NOAA storm reports for your area. Print or screenshot local news coverage of the event. This evidence supports your claim if the carrier questions the storm’s severity.
- Understand cosmetic damage exclusions. Some policies exclude damage that affects appearance but not function. Dented metal flashing or scuffed ridge caps may fall into this category. Read your policy before assuming all visible damage is covered.
- Plan follow-up inspections. Some damage appears gradually, requiring repeat inspections to detect water intrusion or structural compromise. Schedule a second professional inspection 30 days after the storm if you had any interior moisture signs.
- Avoid signing an Assignment of Benefits (AOB). An AOB transfers your claim rights to a contractor, removing you from the process. Florida has had significant AOB fraud issues. Maintain control of your own claim.
The homeowners who get the best claim outcomes are the ones who treat documentation like a job. Every photo, every receipt, every weather report, and every email creates a paper trail that an insurance carrier cannot easily dismiss. The claim is not just about the damage. It is about proving the damage.
A thorough step-by-step inspection checklist built around your specific roof type gives you a consistent framework to follow after every storm event, not just the major ones.
Key takeaways
A complete post-storm roof assessment combines ground-level exterior checks, attic interior inspections, prompt insurance filing, and contractor coordination to protect both your home and your claim.
| Point | Details |
|---|---|
| Start from the ground | Never climb on the roof. Inspect from the perimeter, gutters, and attic for complete coverage. |
| Document before you repair | Date-stamped photos and NOAA weather records are the foundation of a successful insurance claim. |
| File the FNOL first | Submit your First Notice of Loss to your insurer before engaging contractors to protect your claim timeline. |
| Bring a contractor to the adjuster visit | A roofer fluent in Xactimate prevents under-scoped damage and low settlement offers. |
| Plan follow-up inspections | Interior damage can appear weeks later. A second inspection after the next rain catches what the first one misses. |
What I’ve learned guiding homeowners through storm damage claims
The homeowners who struggle most after a storm are the ones who wait. They wait to call their insurer. They wait to get a contractor out. They wait to document the attic. By the time they act, the evidence has degraded, the deadlines are tighter, and the adjuster has already formed an opinion.
The single most valuable thing I tell every homeowner is this: treat the 48 hours after a storm like a job site. Get your phone out, walk the perimeter, go into the attic, and write down everything you see with timestamps. That documentation is worth more than any contractor relationship or insurance contact you have.
I’ve also seen homeowners sign AOB agreements with contractors who showed up uninvited after a storm. They thought they were getting help. They were giving away control of their claim. Florida’s AOB history is complicated, and the homeowners who maintain control of their own claims consistently get better outcomes.
The problems a professional identifies during a thorough inspection go well beyond what any homeowner can see from the ground. That professional report is what turns a disputed claim into a settled one.
— Ryan
Coastal Roofing & Construction is ready when the storm passes
After a major storm, the last thing you need is uncertainty about your roof’s condition. Coastal Roofing & Construction provides thorough post-storm roof inspections for homeowners throughout Tampa Bay, including Clearwater, St. Petersburg, Largo, and surrounding communities.

The Coastal Roofing & Construction team documents damage in detail, provides written estimates that hold up against adjuster reviews, and coordinates directly with your insurance carrier when needed. From residential roof repair to full replacement, every project is handled by manufacturer-certified installers with Owens Corning, GAF, and Tri County Metals credentials. Browse the completed project portfolio to see the quality standard firsthand, then contact the team to schedule your inspection.
FAQ
What is a post-storm roof assessment?
A post-storm roof assessment is a structured inspection of a roof’s exterior, interior, and structural components conducted after severe weather to identify damage, document findings, and determine the need for repairs or replacement.
How soon should I file a roof damage insurance claim?
File your First Notice of Loss within 24–48 hours of discovering damage. Most policies require filing within 30–60 days, but prompt filing preserves evidence and strengthens your claim.
Can I inspect my roof myself after a storm?
You can and should inspect from the ground, gutters, and attic. Climbing on the roof is unsafe and can cause additional damage. A licensed roofing contractor performs the elevated inspection safely.
What interior signs indicate roof damage after a storm?
Look for ceiling stains, active drips, musty odors, light visible through the attic roof deck, and wet insulation. These signs can appear days or weeks after the storm event.
What is an Assignment of Benefits and should I sign one?
An Assignment of Benefits transfers your insurance claim rights to a contractor. Signing one removes you from the claim process. Maintain control of your own claim and work directly with your insurer throughout.