
Roofs deteriorate mainly from six forces: moisture and drainage failure, wind and storm impact, UV radiation and thermal cycling, biological growth, poor installation or ventilation, and structural overload. Salt spray adds a seventh for coastal homes. Industry guidance separates these into two practical buckets: sudden perils (hail, wind, fallen trees) that insurance often covers, and gradual wear (age, moss, deferred maintenance) that homeowners typically pay for out of pocket. Knowing which category your damage falls into shapes every decision that follows.
If you suspect active deterioration right now, here is what to do first:
- Stay off the roof. Ground-level and attic checks give you most of what you need safely.
- Photograph everything from the yard: lifted shingles, staining, sagging areas, and any debris on the surface.
- Check your attic for daylight, wet insulation, or dark staining on the sheathing.
- Call a licensed inspector or contractor before filing an insurance claim — a professional assessment strengthens your documentation.
The sections below cover the signs of each cause, realistic material lifespans, an inspection checklist you can use today, and clear criteria for when a repair can wait versus when you need a contractor on-site this week.
Key Takeaways
Roof deterioration is driven by moisture, UV, biological growth, and installation quality — and catching it early is almost always cheaper than replacing a compromised deck.
| Point | Details |
|---|---|
| Moisture is the primary driver | Water infiltration through failed flashings or clogged gutters causes deck rot faster than any other single factor. |
| Sudden vs. gradual damage | Storm perils (wind, hail) are often insurable; age-related wear (granule loss, moss, deferred maintenance) typically is not. |
| Material lifespans vary widely | Asphalt shingles last roughly 20–30 years; standing seam metal can reach 40 years with proper maintenance. |
| Document before you call | Timestamped photos of damage, NOAA storm data, and prior inspection records strengthen both insurance claims and contractor quotes. |
| Coastal Roofing & Construction | Certified by Owens Corning and GAF, serving Tampa Bay homeowners with inspections, storm restoration, and full roof replacement. |
Table of Contents
- What causes roof deterioration at the material level?
- How do wind, storms, and hail damage your roof?
- How do water, ice dams, and freeze–thaw cycles deteriorate a roof?
- How does UV exposure and heat cycling break down roofing materials?
- Does biological growth actually damage your roof structure?
- How do poor installation and bad ventilation shorten a roof’s life?
- Can added loads and drainage changes cause roof problems?
- How do coastal salt and pollutants accelerate roof decay?
- How long does it take for a roof to deteriorate?
- What are the biggest costs in roof replacement or repair?
- DIY inspection checklist: what to photograph and when to call a pro
- Preventive maintenance and coatings that slow deterioration
- How do adjusters tell normal aging from claimable damage?
- A contractor’s perspective on what actually drives roof failure
- Coastal Roofing & Construction: inspections, repairs, and replacements in Tampa Bay
- Sources
What causes roof deterioration at the material level?
Every roof fails through one or more of four physical mechanisms, and most homeowners see the symptom without recognizing the mechanism driving it.
Moisture-driven decay is the most destructive. Water infiltrates through failed flashings, cracked membranes, or clogged gutters, saturating the underlayment and wood sheathing beneath. Once sheathing stays wet, rot follows within months, not years. Fasteners corrode, lose grip, and allow shingles to lift. The deck softens, creating the spongy feel underfoot that signals structural compromise.
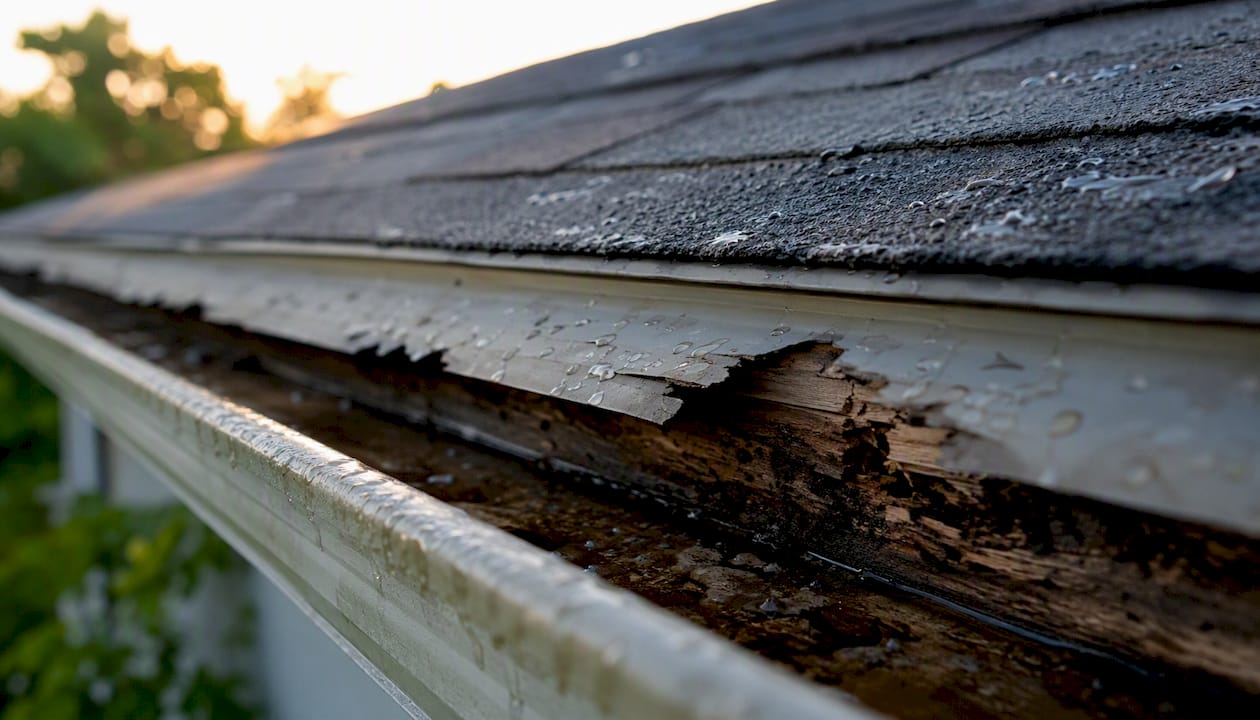
UV photodegradation works more slowly but never stops. Ultraviolet radiation, elevated temperatures, and moisture are primary drivers of chemical and physical degradation in roofing materials, causing brittleness, corrosion, and freeze–thaw damage. Asphalt binders oxidize and harden; granules loosen and wash into gutters; polymer membranes crack at seams.
Mechanical fatigue comes from repeated thermal expansion and contraction. A dark asphalt shingle on a Florida roof can swing 100°F or more between a winter night and a summer afternoon. That daily cycling stresses every fastener, seam, and lap joint over thousands of cycles per year.
Biological and chemical soiling closes the loop. Moss, algae, and lichen trap moisture against surfaces, and dissolved atmospheric pollutants form mild acids that corrode metal components.
The mechanism-to-effect breakdown looks like this:
- UV radiation → granule loss, brittleness, cracked membranes
- Moisture → rot, corrosion, underlayment saturation, deck failure
- Thermal cycling → cracking, seam separation, fastener loosening
- Biological growth → sustained moisture retention, shingle lifting, sheathing rot
- Pollutants and salt → metal corrosion, coating degradation, reduced reflectance
Sudden perils like hail and wind damage differ from these gradual processes in one critical way: they create concentrated, dateable damage that adjusters can distinguish from background wear. That distinction matters when you file a claim.
How do wind, storms, and hail damage your roof?
Wind attacks a roof at its weakest geometry: edges, ridges, corners, and any point where a shingle or panel is not fully adhered. Uplift pressure builds under lifted edges and peels shingles back in a directional pattern that follows the storm’s wind direction. After a storm, look for shingles that are creased, curled at the corners, or missing in a pattern that fans outward from one direction. Random missing shingles scattered across the field usually point to age-related adhesive failure, not wind.
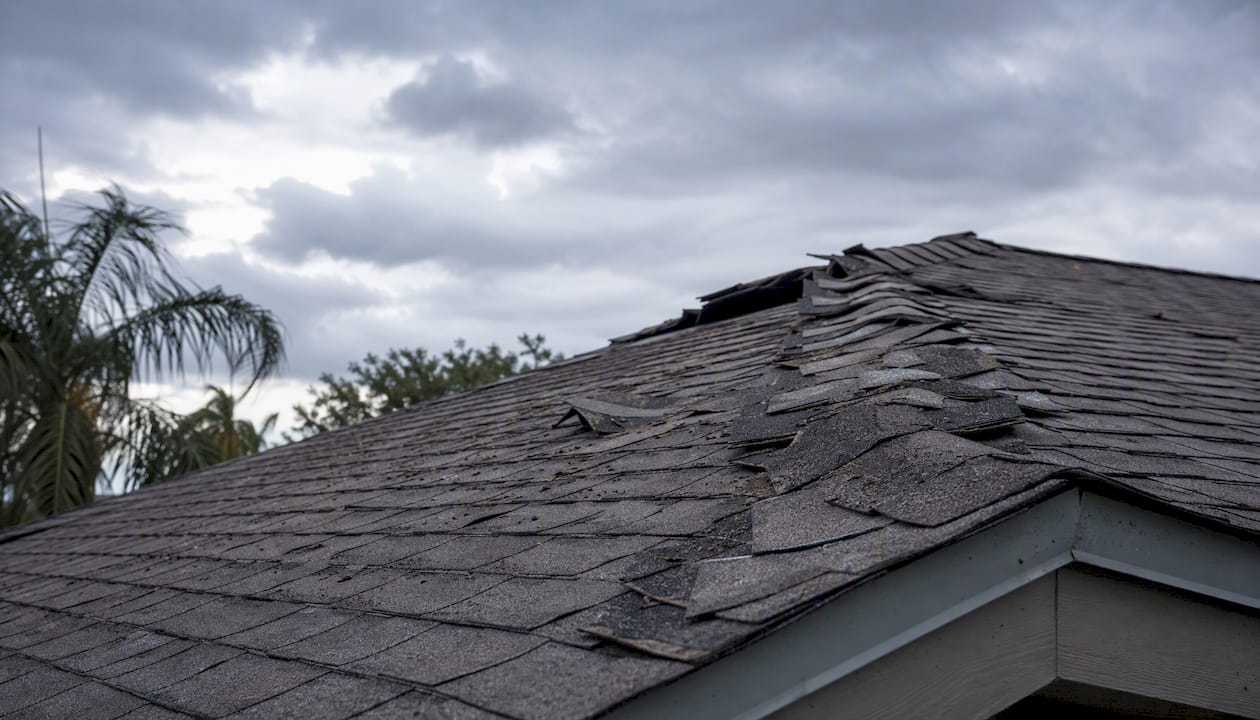
Field experience shows that heat-activated sealants on asphalt shingles begin to lose adhesion after roughly 7–10 years, increasing wind vulnerability well before shingles show visible failure. A roof that looks fine from the ground can be primed for wind damage by the time a major storm arrives.
Hail tells a different story. Quarter-sized hail (roughly 1 inch in diameter) commonly causes noticeable bruising on asphalt shingles, fracturing the fiberglass mat beneath the granule layer. On metal panels, look for circular dents with a consistent diameter across the field. On soft metals like aluminum gutters and downspouts, hail leaves clear evidence that adjusters use to corroborate roof damage claims.
- Wind signs: directional pattern of missing or lifted shingles, creased tabs, exposed underlayment at ridges or rakes
- Hail signs: bruise marks (soft spots under granules), fractured mat, dents on metal, granule accumulation in gutters after a storm
- Debris impact: concentrated punctures or tears, usually near overhanging branches
Capture the directional pattern of damage, any debris still on the roof, and the condition of gutters and downspouts. These photos, timestamped and geotagged, are your strongest evidence for an insurance claim. Avoid climbing the roof yourself — wet or damaged decking can fail without warning.*
For Tampa Bay homeowners, Florida’s hurricane-force winds create uplift loads that exceed what most standard shingle installations are rated for without proper ring-shank nailing and sealed decking.
How do water, ice dams, and freeze–thaw cycles deteriorate a roof?
Standing water is a roof’s most patient enemy. On low-slope or flat sections, ponding water exerts constant hydrostatic pressure against seams and penetrations. Even a pinhole gap in a membrane allows capillary wicking to saturate the insulation board beneath, and once that board stays wet, the deck above it follows.
Ice dams are a northern-climate problem that still affects homes in the upper South during hard winters. The mechanism: warm attic air heats the roof deck, melting snow above. That meltwater runs down to the cold eave overhang, where it refreezes into a ridge of ice. Subsequent melt backs up behind the dam and forces water under shingles at the eave, bypassing the underlayment entirely. The result is ceiling staining and insulation damage that appears weeks after the storm, making the cause hard to trace without knowing what to look for.
Freeze–thaw cycling compounds the problem. Over a single winter, a hairline crack in a tile or membrane can become a significant gap.
Signs to photograph and document:
- Interior ceiling stains, especially near exterior walls or eaves
- Soft or spongy spots when walking the attic floor (wet insulation)
- Dark staining or discoloration on roof sheathing visible from the attic hatch
- Sagging eave sections or gutters pulling away from the fascia
- Rust streaks below metal flashings or vents
Pro Tip: If you have ice dams forming, a roof rake (a long-handled tool used from the ground) can safely remove the bottom 3–4 feet of snow from eaves without you climbing. Never use a heat gun or open flame near roofing materials. Clearing gutters in late fall, before the first freeze, is the single most effective preventive step.
How does UV exposure and heat cycling break down roofing materials?
Florida roofs face some of the highest UV index readings in the continental United States, and the damage accumulates whether or not a storm ever hits. Photodegradation breaks down the asphalt binder that holds granules in place on shingles. As the binder oxidizes and hardens, granules detach and wash into gutters. Bare spots on shingles are not cosmetic — they expose the fiberglass mat directly to UV, accelerating the failure timeline sharply.
Thermal cycling is the companion problem. A dark asphalt shingle absorbs solar radiation and expands; at night it contracts. Every fastener, every lap joint, and every sealant bead goes through that cycle daily. Polymer-based membranes on flat roofs are especially vulnerable at seams, where repeated movement eventually separates the bond.
Material performance varies significantly:
- 3-tab and standard architectural asphalt shingles: most UV-vulnerable; granule loss visible within 10–15 years in high-sun climates
- Modified bitumen and TPO membranes: moderate UV resistance; seam integrity is the critical failure point
- Clay and concrete tile: high UV resistance; the tile itself rarely fails from UV, but the underlayment beneath it does.
- Properly coated standing seam metal: excellent UV and thermal performance; coating integrity determines longevity
Signs of UV and heat damage to look for:
- Faded, chalky, or uneven color across the roof field
- Granules accumulating in gutters or at downspout outlets
- Brittle shingles that crack when flexed (visible at the rake edge)
- Cracked or blistered membrane surface on flat sections
- Curling or cupping at shingle edges
Does biological growth actually damage your roof structure?
Yes, and more seriously than most homeowners expect. Moss and heavy biological growth retain water against roof surfaces, keeping materials saturated and accelerating rot of the sheathing. A thick moss mat can hold moisture against shingles for days after rain stops, creating conditions that would otherwise require a sustained leak to replicate. Algae streaks (the black staining common on asphalt shingles) are primarily cosmetic, but they signal moisture-retention conditions that favor moss and lichen colonization over time.
Lichen is the most aggressive of the three. Its root-like structures (rhizines) physically penetrate the granule layer and bond to the shingle surface. Removing lichen without damaging the shingle beneath requires chemical treatment, not mechanical scraping.
North-facing roof slopes stay shaded and damp longer than south-facing slopes, which is why biological growth concentrates there first. Overhanging branches compound the problem by depositing leaf debris that traps additional moisture and blocks sunlight that would otherwise dry the surface.
Practical steps:
- Keep branches trimmed back at least 10 feet from the roof surface
- Clean gutters and valleys at least twice per year (spring and fall)
- Install zinc or copper ridge strips; rainwater carries trace amounts of these metals down the slope, inhibiting biological growth
Pro Tip: Avoid pressure washing to remove moss. High-pressure water forces moisture under shingles and can fracture the granule layer. Use a soft-bristle brush or air broom for mechanical removal, then apply a diluted zinc sulfate or copper sulfate solution for long-term control. Let the treatment work over several weeks rather than scrubbing aggressively.
How do poor installation and bad ventilation shorten a roof’s life?
A roof installed with the wrong nail pattern, skipped flashing details, or inadequate ventilation will fail years before its rated lifespan, and the failure often looks like a weather event rather than a workmanship defect. That distinction matters for warranty claims and insurance.
Common installation errors that lead to premature failure:
- Improper flashing at walls, chimneys, and valleys: step flashing that is not integrated into the underlayment allows water to travel behind the flashing and into the wall cavity
- Insufficient nail penetration or wrong nail pattern: shingles that are face-nailed or under-nailed lose wind resistance quickly; IBHS research confirms that sealant adhesion and nail pattern together determine early wind performance
- Missing or improperly installed pipe boot flashings: rubber boots crack within 5–10 years in high-UV climates and are a leading source of slow leaks
- Improper valley details: open valleys with exposed metal require correct gauge and overlap; closed-cut valleys need proper shingle alignment to shed water without pooling
Ventilation is the less visible problem. An under-ventilated attic traps heat, raising roof deck temperatures well above ambient air temperature. That accelerates shingle aging, increases the risk of ice dam formation in colder climates, and raises attic humidity to levels that promote mold and wood decay. The standard guidance is a minimum of 1 square foot of net free ventilation area per 150 square feet of attic floor, balanced between intake (soffit) and exhaust (ridge or gable).
Inspection checklist items you can check before calling a pro:
- Look for exposed or lifted pipe boot flashings around any roof penetrations.
- Check that ridge caps are present and lying flat along the entire ridge line.
- From the attic, look for daylight around any penetration or at the eaves.
- Check soffit vents for paint-over or debris blockage.
- Look for dark staining or condensation on the underside of the roof sheathing.
Can added loads and drainage changes cause roof problems?
They can, and the damage often appears in a location that seems unrelated to the change. Adding rooftop HVAC equipment, solar panels, or a rooftop deck creates point loads that the original structure may not have been designed to carry. Over time, those loads deflect the deck, creating low spots where water ponds. New penetrations for equipment also introduce potential leak points if not properly flashed.
Rerouted drainage is equally problematic. A new addition or a neighbor’s construction project can redirect runoff onto a section of roof that previously stayed dry, concentrating water at a valley or eave that was not sized for that volume.
Signs of structural distress to watch for:
- Visible sagging or deflection in the roof deck, especially between rafters
- New interior leaks that appeared after construction activity nearby
- Concentrated wet spots or staining in one area of the attic after rain
- Gutters pulling away from the fascia under concentrated runoff load
When sagging is visible from the ground or the attic shows significant deflection, a structural engineer’s assessment is appropriate before a roofer begins work. A contractor can replace the roofing material, but only an engineer can certify that the structure beneath it is adequate for the loads it carries.
How do coastal salt and pollutants accelerate roof decay?
Salt spray is a corrosion accelerant that inland homeowners rarely contend with. For homes within a few miles of the Gulf Coast, salt particles deposit on metal flashings, fasteners, and panel seams with every onshore breeze. Dissolved atmospheric pollutants from combustion and industrial sources form mild acids that attack metal surfaces and reduce the reflective properties of coatings, increasing solar heat gain.
The practical consequences for Tampa Bay homeowners:
- Galvanized fasteners corrode faster in salt-air environments; stainless steel or hot-dipped galvanized fasteners with appropriate coating are the correct specification
- Aluminum flashings perform better than bare steel in coastal conditions, but any coating breach accelerates corrosion at that point
- Tile roofs are not immune: metal clips, mortar, and the underlayment beneath tiles all face accelerated degradation from salt exposure
Marine-layer humidity and coastal soiling also reduce the reflectance of light-colored roofing materials, which matters for energy efficiency and for materials rated under Florida’s building code energy provisions.
Coastal maintenance priorities differ from inland:
- Inspect metal components (flashings, fasteners, ridge caps) annually rather than every two years
- Rinse roof surfaces with fresh water after major storm events to remove salt deposits
- Specify sacrificial coatings or factory-applied Kynar/PVDF finishes on metal roofing for maximum corrosion resistance
How long does it take for a roof to deteriorate?
Lifespan varies more by installation quality, climate, and maintenance than by material alone. Common guidance places asphalt shingles at roughly 20–30 years, while premium materials like slate or fired clay tiles can last multiple decades with proper maintenance. In Florida’s high-UV, high-humidity, hurricane-exposed environment, the lower end of those ranges is more realistic without proactive maintenance.
| Material | Typical Lifespan | Common Failure Mode |
|---|---|---|
| 3-tab asphalt shingles | 15–20 years | Granule loss, wind uplift |
| Architectural asphalt shingles | 25–30 years | Cracking, granule loss, flashing failure |
| Standing seam metal | 40 years | Coating failure, fastener corrosion |
| Concrete or clay tile | 40 years | Underlayment failure, cracked tiles |
| Slate | 100 years | Fastener corrosion, broken slates |
| TPO / flat membrane | 15–25 years | Seam separation, puncture, UV degradation |
Factors that commonly shorten these ranges:
- Coastal salt exposure (accelerates corrosion of all metal components)
- Poor attic ventilation (raises deck temperature, shortens shingle life)
- Deferred gutter and moss maintenance
- Installation in cool conditions without proper sealant activation
- Repeated storm exposure without post-storm inspection and repair
What are the biggest costs in roof replacement or repair?
The roofing material itself is typically the largest single line item in a replacement, but deck repair can exceed material costs when deterioration has been left unaddressed. Understanding the cost drivers helps you evaluate quotes and prioritize repairs intelligently.
Main cost drivers in a roof replacement:
- Roofing material: asphalt shingles sit at the lower end of the cost range; standing seam metal, clay tile, and slate sit significantly higher per square foot
- Tear-off and disposal: removing multiple layers of old roofing adds labor and disposal fees; some jurisdictions limit the number of shingle layers permitted before a full tear-off is required
- Deck repair: rotted or delaminated sheathing must be replaced before new roofing is installed; in neglected roofs, deck repair can add 20–40% to the base replacement cost
- Permit and inspection fees: required in most Florida jurisdictions; fees vary by county and project scope
- Complexity: valleys, multiple penetrations, steep pitch, and dormers all add labor time and material waste
The most cost-effective repair sequence is: stop active leaks first (emergency patching or temporary tarping), then address deck damage, then replace flashings, then re-roof. Replacing roofing material over a compromised deck is money spent twice.
DIY inspection checklist: what to photograph and when to call a pro
A thorough ground-level and attic inspection gives you the information a contractor needs to quote accurately and an adjuster needs to evaluate a claim. Do this in sequence.
Ground-level check (binoculars or phone zoom):
- Walk the perimeter and photograph each roof plane from a 45-degree angle.
- Look for missing, lifted, or creased shingles and note the directional pattern.
- Check gutters for granule accumulation (a sign of accelerated shingle wear).
- Look for moss or algae growth, especially on north-facing slopes.
- Check that all flashings at walls, chimneys, and skylights are lying flat with no gaps.
- Note any sagging sections visible along the ridge or eave line.
Attic check:
- Enter the attic on a bright day and look for pinpoints of daylight around any penetration.
- Check the underside of the sheathing for dark staining, wet spots, or soft areas.
- Look for wet or compressed insulation near exterior walls.
- Check that soffit vents are open and unobstructed.
Photo guidance for claims and contractor quotes:
- Timestamp and geotag every photo (your phone does this automatically if location services are on).
- Include a scale reference (a coin, a ruler) next to any damage detail.
- Photograph the full roof plane first, then close-ups of specific damage.
- Capture the directional pattern of any wind damage across multiple photos.
- Document interior staining with the date and note the most recent weather event.
Common inspection findings that contractors identify include flashing separation, failed pipe boots, and granule loss patterns that indicate accelerated aging in specific zones.
Call a pro immediately if you see:
- Any area of visible sagging from the ground
- Active interior leaks during or after rain
- A fallen tree or large branch on the roof
- Exposed decking or underlayment over a significant area
- Soft or spongy attic floor indicating saturated insulation and possible deck rot
Flashing failure, clogged gutters, and damaged penetrations are among the most frequent leak sources and are straightforward to photograph for quotes or claims.
Preventive maintenance and coatings that slow deterioration
The most cost-effective roofing strategy is a consistent maintenance schedule that catches small failures before they become structural ones. Properly applied acrylic elastomeric coatings can extend the service life of aging membranes by sealing voids, protecting against UV, and reducing granule loss. They are a maintenance strategy, not a substitute for a failed substrate — if the deck is rotted or the membrane has separated at seams, a coating applied over the top will fail within a season.
Coatings work best on:
- Aging TPO or modified bitumen flat roofs with intact seams but surface degradation
- Metal roofs where the factory coating has faded but the panel and fasteners are structurally sound
- Low-slope sections where UV exposure is the primary deterioration driver
Pro Tip: If a contractor recommends a coating on a roof with active leaks or soft decking, get a second opinion. Coatings seal surfaces, not structures. The right sequence is repair first, coat second.
A practical annual maintenance schedule:
- Spring: Clear gutters and downspouts after winter debris; inspect flashings for winter movement; check attic ventilation.
- Late summer (pre-hurricane season): Inspect all penetrations and pipe boots; confirm ridge cap integrity; trim branches to the 10-foot clearance.
- Fall: Clean gutters again after leaf drop; apply moss treatment if biological growth is present; schedule a professional inspection if the roof is over 15 years old.
- After any named storm: Ground-level photo documentation before any debris is moved; call a licensed contractor for a post-storm assessment.
Manufacturer certifications matter here. Owens Corning Platinum and GAF Master Elite certifications require installers to meet training and quality standards that support warranty claims. Choosing a certified installer is the single most reliable way to preserve a manufacturer’s extended warranty, which often covers workmanship defects that a standard policy excludes.
For metal roofs specifically, a metal roof maintenance checklist covers the fastener inspection, sealant checks, and coating assessment steps that differ from shingle maintenance.
How do adjusters tell normal aging from claimable damage?
The distinction between wear-and-tear and insurable damage is not always obvious, and it is the central question in most disputed roof claims. IIBEC Technical Advisory 025-2025 recommends assessing three criteria to determine whether a roofing system has been damaged by an external event rather than experiencing expected deterioration: appearance, functionality, and diminished life expectancy.
In practice, adjusters look for:
- Directional pattern: wind damage follows the storm’s direction; wear-and-tear is distributed across the field
- Dateable event: damage that correlates with a documented weather event (NOAA storm records, hail reports) is more likely to be covered
- Concentrated impact: hail bruising appears in a consistent pattern across all exposed surfaces (roof, gutters, AC fins, painted wood trim); random granule loss does not
- Age-appropriate condition: a 25-year-old shingle roof with granule loss and brittleness is showing expected wear; the same condition on a 10-year-old roof after a hail event is a different story
Claims documentation checklist:
- Photograph damage within 24–48 hours of the event, before any temporary repairs.
- Pull NOAA storm data or a hail report for your zip code and date of the event.
- Collect any prior inspection reports or maintenance invoices that show the roof’s condition before the event.
- Document all soft metals (gutters, AC fins, painted trim) that show consistent impact marks.
- Keep receipts for any emergency tarping or temporary repairs — these are typically reimbursable.
- Request a written scope of loss from the adjuster and compare it to your contractor’s assessment.
Wind and hail are the most common insurable roof damages after storms; moss, granule loss from age, and decking rot are typically categorized as wear and excluded by most policies.
A contractor’s perspective on what actually drives roof failure
The conventional wisdom is that roofs fail because of storms. In Tampa Bay, that is only half the story.
The roofs that fail catastrophically during hurricane season are almost always the ones that were already compromised: deferred maintenance, a missed flashing repair, a pipe boot that cracked two seasons ago and was never replaced. The storm gets the blame, but the deterioration started years earlier. What I see most often in this area is not dramatic storm damage — it is slow moisture infiltration at a flashing or penetration that went unnoticed until the ceiling stained, and by then the deck is already soft.
The practical recommendation for any Tampa Bay homeowner: schedule a professional inspection before hurricane season, not after. A contractor can identify the three or four small failures that, left unaddressed, become a full replacement claim after a named storm. That inspection costs a fraction of a deductible, and it gives you documentation of your roof’s pre-storm condition — which is exactly what you need if you do file a claim later.
Coastal Roofing & Construction serves Pinellas, Hillsborough, and Pasco counties, and the team sees these patterns across hundreds of roofs each year. The importance of proactive roof maintenance is not abstract here — it is the difference between a repair and a replacement.
Coastal Roofing & Construction: inspections, repairs, and replacements in Tampa Bay
When a roof inspection reveals active deterioration, the next step is a contractor who knows the local climate, the local code, and the specific failure modes that Tampa Bay’s combination of salt air, UV intensity, and hurricane exposure creates.

Coastal Roofing & Construction is a licensed, insured, family-owned contractor serving homeowners across Pinellas, Hillsborough, and Pasco counties. The team is certified by Owens Corning and GAF, which means installations qualify for extended manufacturer warranties that standard contractors cannot offer. Services cover the full scope: storm damage assessment and restoration, residential roof replacement, standing seam metal roofing, architectural shingle systems, tile, flat roofing (TPO and modified bitumen), and preventive maintenance programs. Before your inspection, have your last replacement date, any existing warranty documents, and your storm-event photos ready. View completed projects or request a replacement estimate to get started.
Sources
The sources below were used for technical claims, lifespan estimates, and insurance guidance throughout this article.
- Identifying Signs of Roof Damage – Nationwide
- Weathering of Roofing Materials—An overview
- Types of Roof Damage: 9 Types, Cost & Coverage
- Natural weathering and hazard exposure – IBHS