
A roof replacement is defined as the complete removal of your existing roofing system and installation of a new one, from the deck up. Understanding the roof replacement process explained in full gives you the power to set realistic expectations, ask the right questions, and protect one of your largest investments. In Tampa Bay, Florida’s intense UV exposure, high humidity, and hurricane season make this process more demanding than in most other regions. Coastal Roofing & Construction works with homeowners across Pinellas, Hillsborough, and Pasco counties every day, and the homeowners who are most satisfied are always the ones who understood the process before work began.
What are the essential steps of the roof replacement process?
A professional roof replacement follows a clear, sequential order. Skipping or rushing any phase creates problems that show up years later, often as leaks, premature failure, or voided warranties.
-
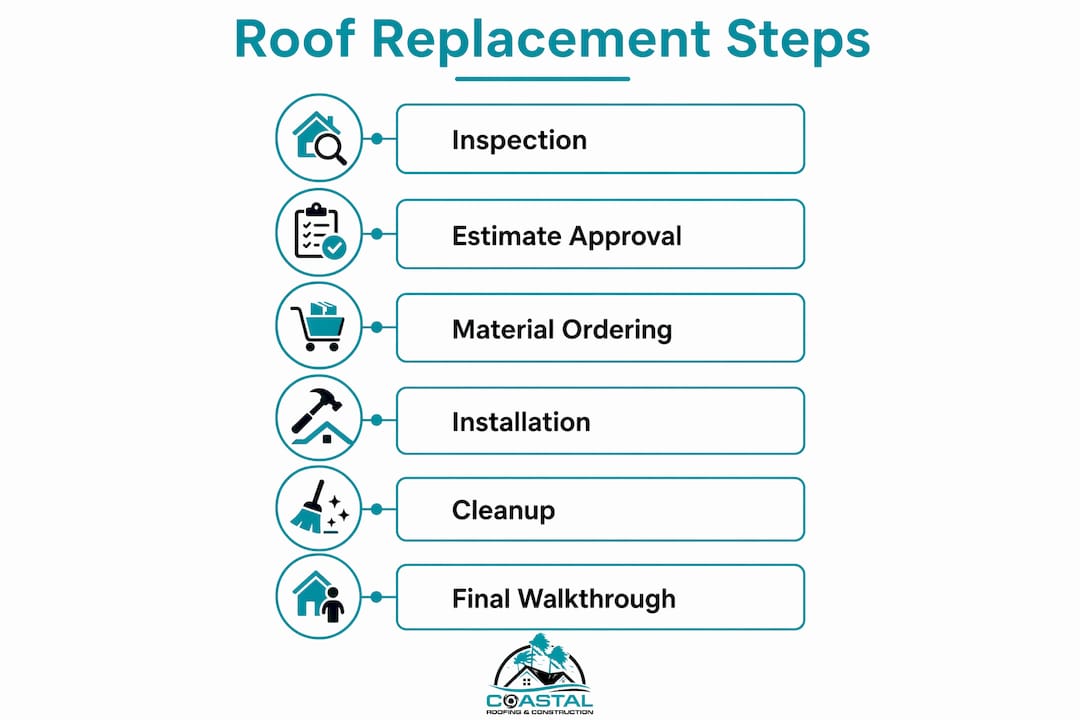
Initial inspection. A licensed contractor inspects your roof on-site. Inspections typically take 30–60 minutes, covering shingles, flashing, decking, gutters, and attic ventilation. Coastal Roofing & Construction provides written inspection findings so you have a clear picture of what needs replacing and why.
-
Estimate and material selection. A detailed written estimate arrives within 24–48 hours. This is where you choose your roofing material. In Tampa Bay, the most common options are architectural asphalt shingles, standing seam metal, and concrete or clay tile. Each carries different cost, lifespan, and performance characteristics.
-
Scheduling and pre-installation prep. Once you approve the estimate and sign the contract, your project gets scheduled. Lead times vary by season and contractor workload. You will receive a start date and a list of homeowner prep tasks.
-
Tear-off. The crew removes all existing roofing material down to the decking. This step is non-negotiable for quality work in Florida. Any damaged plywood or OSB decking gets replaced before installation begins.
-
Underlayment and flashing installation. A synthetic or felt underlayment goes down first as a moisture barrier. Flashing is then installed at all roof penetrations, valleys, and transitions. Flashing quality is the single most important factor in preventing future leaks.
-
Roofing material installation. Shingles, metal panels, or tile go on in a specific pattern from the eave up. Ridge caps seal the peak. Manufacturer installation specs must be followed exactly to maintain warranty coverage.
-
Cleanup and final walkthrough. The crew removes all debris and runs a magnetic nail sweep across your yard and driveway. You then walk the completed roof with your contractor to review the work before signing off.
Pro Tip: Ask your contractor for a written scope of work before signing anything. A vague contract is the most common source of disputes during a roof replacement project.
How long does a roof replacement take?
The total project timeline and the active installation days are two very different numbers. Homeowners who confuse them end up frustrated.
Active installation time varies by material. The table below shows realistic ranges for Tampa Bay projects.
| Roofing material | Active installation days | Total project timeline |
|---|---|---|
| Architectural asphalt shingles | 1–3 days | 2–4 weeks |
| Standing seam metal | 3–7 days | 4–8 weeks |
| Concrete or clay tile | 5–14 days | 6–10 weeks |
The total timeline includes inspection, estimate approval, material ordering, and scheduling. Insurance claims add another 2–4 weeks on top of that, because adjuster visits and claim approvals must happen before work can begin. If your replacement follows storm damage, factor that delay into your planning from day one.
Tampa Bay’s weather also affects scheduling. Contractors book up fast ahead of hurricane season, typically from may through october. Scheduling your replacement in the late fall or winter often means shorter wait times and more favorable installation conditions.
Pro Tip: If your project involves an insurance claim, ask your contractor if they have experience working directly with adjusters. A contractor who understands the roof insurance claim process can significantly reduce delays.
What should Tampa Bay homeowners know about material selection?
Material selection is where most homeowners focus only on price. That is the wrong starting point. The right material for a Tampa Bay home balances upfront cost, long-term durability, and performance in Florida’s specific climate.
Common roofing materials and cost ranges:
- Architectural asphalt shingles: The most affordable and fastest to install. Material costs run $4.00–$7.50 per square foot. Owens Corning and GAF both offer shingle lines rated for high-wind and high-UV environments, which matters in coastal Tampa Bay.
- Standing seam metal: The premium choice for longevity and storm resistance. Costs range from $8.00–$14.00 per square foot. Coastal Roofing & Construction is certified with Tri County Metals and installs standing seam metal roofing that carries some of the strongest warranties available.
- Concrete and clay tile: A traditional Florida look with excellent durability. Costs run $8.00–$15.00 per square foot. Tile requires a reinforced roof structure and adds significant weight, so a structural check is part of the pre-installation process.
Beyond the visible material, three hidden components determine how long your roof actually lasts. Quality underlayment acts as your last line of defense against moisture. Proper flashing at chimneys, skylights, and valleys stops the leaks that shingles alone cannot prevent. And the condition of your decking sets the foundation for everything above it. These hidden components determine long-term durability far more than the brand of shingle you choose.
One decision that comes up often in Tampa Bay is whether to do a full tear-off or a roof-over, also called reroofing or an overlay. The answer for Florida homes is almost always full tear-off. Overlays trap heat and hide existing deck damage, which can cause premature failure within just a few years in Florida’s climate. Full tear-off also keeps you in compliance with manufacturer warranty requirements. For a deeper look at how these options compare, the tile vs. shingle guide from Coastal Roofing & Construction breaks down the tradeoffs by material type.
How should homeowners prepare for installation day?
Preparation on your end directly affects how smoothly the project runs. A few simple steps before the crew arrives prevent damage and keep the job on schedule.
Before installation day:
- Move all vehicles out of the driveway and away from the home. Falling debris and dumpster placement require clear access.
- Secure or remove fragile items from walls, shelves, and attic spaces. Vibration from tear-off can shake things loose inside the home.
- Notify your neighbors. A roofing crew starts early and works loud. A heads-up keeps relationships intact.
- Cover or move potted plants and outdoor furniture near the roofline. Protecting your landscaping during a roof replacement project takes only a few minutes but prevents real damage.
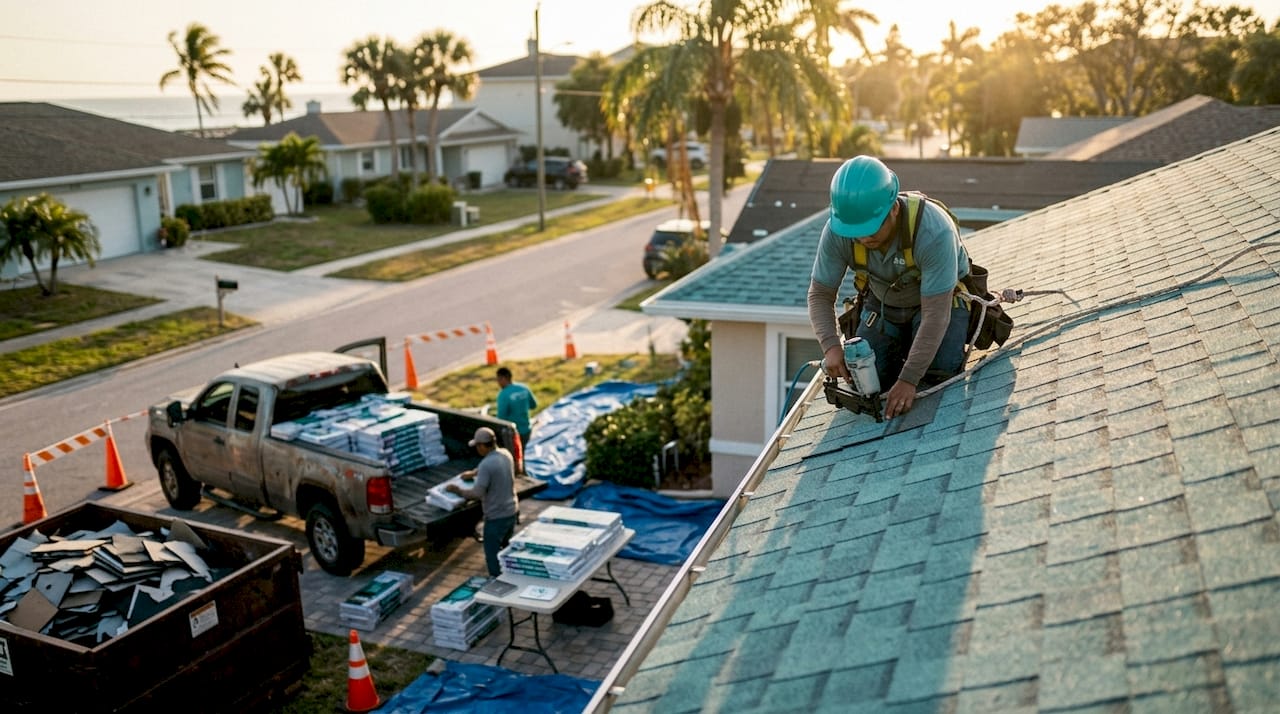
On installation day, the crew sets up tarps around the perimeter to catch falling debris. A dumpster or trailer is positioned for tear-off waste. The tear-off phase is the loudest part of the project, typically lasting a few hours for an average-sized home. Once the old material is off, the decking inspection happens immediately. Any rotted or damaged plywood gets replaced before underlayment goes down.
After installation, a thorough cleanup is not optional. A professional crew runs a magnetic roller across every inch of your yard, driveway, and landscaping to collect nails. Leftover nails in your grass are a safety hazard and a sign of a contractor who cuts corners. Cleanup standards are one of the clearest indicators of overall contractor quality.
Pro Tip: Before the crew leaves, ask to see the magnetic nail sweep being done. It takes five minutes and confirms your contractor takes cleanup as seriously as the installation itself.
The final walkthrough is your opportunity to review every detail. Check the ridge cap, inspect the flashing at all penetrations, and confirm your warranty documents and permit paperwork are in hand before signing the completion form.
Key Takeaways
A complete roof replacement follows a defined sequence from inspection through cleanup, and understanding each phase protects your investment and prevents costly surprises.
| Point | Details |
|---|---|
| Full tear-off is non-negotiable | Overlays trap heat and hide deck damage, leading to early failure in Florida’s climate. |
| Timeline varies by material | Asphalt shingles install in 1–3 days; tile can take up to 14 days on-site. |
| Hidden components determine durability | Underlayment, flashing, and decking condition matter more than shingle brand alone. |
| Insurance claims add time | Adjuster visits and approvals add 2–4 weeks to the total project timeline. |
| Cleanup signals contractor quality | A magnetic nail sweep and full debris removal are marks of a professional crew. |
What I’ve learned after years of Tampa Bay roof replacements
The question I hear most often from homeowners is some version of: “Why does this cost so much more than I expected?” The honest answer is almost always the same. The visible shingles are the smallest part of the job. The real cost is in the labor, the underlayment, the flashing, and the decking repairs that nobody photographs for the estimate.
The detail that catches homeowners off guard most often is the decking allowance. Pre-negotiating a per-sheet rate for plywood replacement before work starts is standard practice among experienced contractors. It prevents the mid-project phone call where a homeowner gets surprised by a $1,500 add-on they never agreed to. If a contractor’s estimate does not mention a decking allowance at all, ask about it directly before signing.
Flashing is the other area where I see the biggest gap between what homeowners expect and what actually determines roof performance. A beautiful shingle installation with sloppy flashing around a chimney or skylight will leak within a few years. The shingles get the attention, but flashing at penetrations is where most leaks actually start. Ask your contractor specifically how they handle flashing at every roof penetration before work begins.
Finally, cleanup is not a small thing. I have seen homeowners find roofing nails in their yard for months after a project ended. That is not acceptable. The magnetic sweep is a two-minute task that separates contractors who take pride in their work from those who just want to move to the next job.
— Ryan
Coastal Roofing & Construction is ready to walk you through every step
Replacing your roof is a significant project, and you should not have to figure it out alone. Coastal Roofing & Construction has served Tampa Bay homeowners across Pinellas, Hillsborough, and Pasco counties with licensed, insured, and manufacturer-certified roof replacement work.

Every project starts with a thorough on-site inspection and a detailed written estimate tailored to your home and your local climate. Coastal Roofing & Construction is certified with Owens Corning, GAF, and Tri County Metals, which means the warranties behind your new roof are backed by the manufacturers themselves. Browse completed replacement projects to see the quality firsthand, or visit the residential roof replacement page to request your free inspection and estimate today.
FAQ
How long does a full roof replacement take in Tampa Bay?
The total project timeline runs 2–8 weeks from inspection to completion, depending on material type and scheduling. Active installation takes 1–3 days for asphalt shingles and up to 14 days for tile.
Is a roof-over a good option for Florida homes?
No. Overlays are not recommended for Florida homes because they trap heat, hide deck damage, and can void manufacturer warranties. Full tear-off is the standard for Tampa Bay replacements.
What roofing material lasts longest in Tampa Bay’s climate?
Standing seam metal roofing offers the longest lifespan and best storm resistance for Florida’s coastal climate. Concrete and clay tile also perform well, though they require a reinforced roof structure.
What is a decking allowance and why does it matter?
A decking allowance is a pre-agreed per-sheet rate for plywood replacement discovered during tear-off. It prevents unexpected charges mid-project and is a sign of a transparent contractor.
How do I know if my contractor did a thorough cleanup?
Ask to watch the magnetic nail sweep before the crew leaves. A professional crew covers every inch of your yard, driveway, and landscaping to collect nails and debris after installation.