
If you see missing or loose shingles, heavy granule loss, new dents on vents or gutters, or a sagging section of decking, your roof likely took hurricane damage. Attic water stains confirm active leaking. The right first move is to document everything safely from the ground or attic, then call a licensed roofing contractor before climbing up to check anything yourself.
TL;DR:
- Inspect from the ground and attic first; never climb near downed power lines, standing water, soft decking, or sagging areas, and call a professional.
- Photograph and video damage before cleanup, use dated images, keep receipts for emergency tarping, and save damaged materials that an adjuster may request.
- Some Florida jurisdictions may require the entire roof to meet current code when repairs reach 25% within a defined period.
- Widespread granule loss, soft or rotted decking, or several blown off areas on an older roof can favor replacement over isolated repairs.
Table of Contents
- Roof and Attic Signs to Look for After a Hurricane
- Safe Inspection Steps: Ground, Attic, and When Not to Climb
- Documenting Damage and Understanding Insurance Timelines
- What Comes Next: Mitigation, Professional Inspection, and Repair Decisions
- How a Certified Inspection Checklist Supports Your Claim
- A Contractor’s View on What to Fix First
- How We Can Help After Storm Damage
- FAQ
- Sources
Roof and Attic Signs to Look for After a Hurricane
Wind and flying debris attack a roof in predictable places, and knowing what to look for turns a confusing mess into a clear checklist. Start at the shingle surface. Missing, torn, or creased shingles mean the seal has broken and water can get underneath on the next rain. Lifted or raised shingles often show exposed underlayment or raised nail heads, both signs that wind got under the edge and pried the material loose.
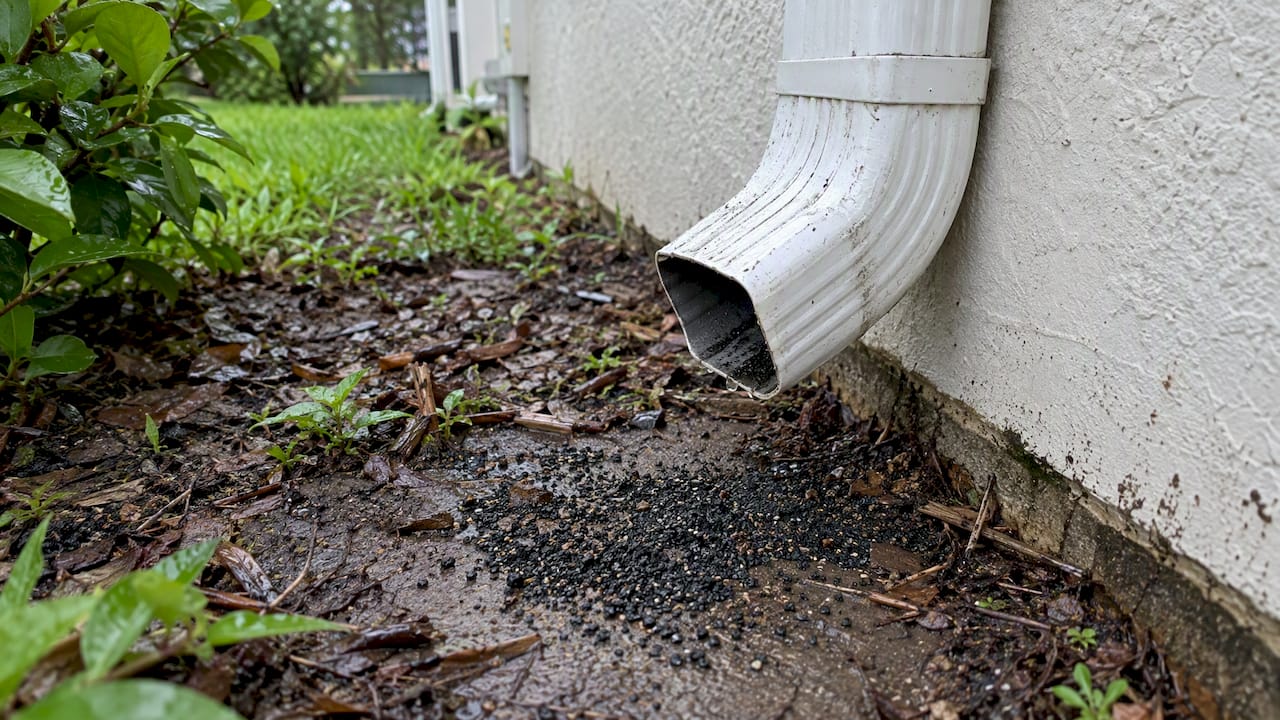
Granule loss is easy to miss but tells you a lot. Those small grains protect shingles from UV damage and give them their fire resistance, so when you spot bare, dark patches on the roof or a buildup of granules in the gutters, the shingle’s protective layer is wearing thin or has already failed. Manufacturer guidance from GAF’s storm damage overview points to granule accumulation in gutters and downspouts as one of the most reliable signals that wind or hail stripped the shingle surface.
One of the more overlooked findings after major storms involves secondary systems. FEMA’s Mitigation Assessment Team review of Hurricane Michael recovery found that wind-driven damage to vents and soffits created large openings that let in water even in homes where shingle damage looked minor from the ground, which is part of why attic and interior checks matter as much as the roof surface itself.
Watch for these additional signs during your walk-around:
- Circular dents on plumbing vents, flashing, or gutters, which usually mean hail impact rather than wind.
- Loose, torn, or missing flashing around chimneys, skylights, and roof penetrations.
- Gaps or separation where vents and soffits meet the roofline.
- Bent, pulled-away, or clogged gutters and downspouts holding granule residue or shingle fragments.
- Sagging roof lines or any spot where you can see daylight through the sheathing from inside the attic.
- Brown or yellow ceiling stains, damp insulation, or a musty attic smell.
A sagging section of decking or visible daylight through the roof boards is a structural red flag, not a cosmetic one, and it usually means the repair conversation needs to happen fast.
Safe Inspection Steps: Ground, Attic, and When Not to Climb
Checking for damage is useful, but it only helps if you do it without getting hurt. Work through three tiers, starting from the safest option.
- Walk the perimeter of your home at ground level, looking up at the roofline, gutters, and vents with binoculars if you have them.
- Go into the attic with a flashlight and check for water stains, wet insulation, or light coming through the roof boards.
- Only get on the roof if local authorities have given an all-clear, the roof pitch is low, the surface is dry, and you have stable footing, otherwise leave it to a professional.
Skip the roof entirely if there are downed power lines nearby, standing water, or any area that looks like it might be soft or sagging. Never step near a spot where you can see daylight through the decking from below.
Take photos and video as you go. Dated images work best, so use your phone’s camera rather than an older device without a timestamp. Get wide shots that show context plus close-ups of specific damage, granules collecting in the gutter line, and any attic staining or wet insulation. NAIC’s storm guidance recommends documenting losses this way before cleanup begins, since cleaned-up debris is evidence you can’t recover later.
Pro Tip: Shoot a slow video pass around the entire exterior before taking any close-up photos, so you have one continuous record of the roof’s condition.
Stop and call a professional if you spot sagging, daylight through the deck, large missing sections, or heavy debris piled on the roof. None of those are safe to assess from a ladder.
Documenting Damage and Understanding Insurance Timelines
Good documentation protects your claim and speeds up repairs. Keep a written log with dates, the storm event, and a room-by-room or section-by-section list of what you found. Save damaged materials like torn shingles or broken vent caps when possible, since adjusters sometimes want to see the physical piece, not just a photo.
- Photograph and video every damaged area before any cleanup or temporary repair work.
- Notify your insurer as soon as you discover damage, since early reporting under NAIC guidance helps preserve evidence and can speed up assistance — learn more about the process in our guide to filing a roof claim after storm damage.
- Keep every receipt for temporary mitigation work like tarping, since those costs are often reimbursable when documented.
- Bring your roof’s age, maintenance history, and any prior inspection reports to your adjuster meeting, along with a contractor estimate.
In some jurisdictions, including parts of Florida, building code provisions can require bringing an entire roof up to current code if a large portion, often 25% or more, is repaired within a defined period. That can turn what looked like a partial repair into a full replacement, so check with your local building authority or your contractor before assuming a patch job is enough.
What Comes Next: Mitigation, Professional Inspection, and Repair Decisions
Once damage is documented, the priority shifts to stopping further water intrusion without making the claims process harder. Licensed emergency tarping is the standard bridge between storm damage and permanent repair, and keeping the invoice alongside your photos supports reimbursement later.
A professional inspection goes further than a homeowner’s visual check. Contractors examine the decking for soft spots or rot, assess the underlayment, check fastener patterns, inspect flashing at every penetration, and look at ventilation and soffit condition for signs of wind intrusion that aren’t visible from the ground.
- Heavy or widespread granule loss across multiple slopes often points toward replacement rather than a patch repair.
- Soft, rotted, or sagging decking usually means replacement, since repairs won’t hold on a compromised substrate.
- Several separate areas of blown-off shingles, especially on an older roof, tend to tip the decision toward full replacement over spot repair.
Pro Tip: Ask any contractor for a written inspection report with photos, not just a verbal estimate, since that documentation often matters as much to your insurer as it does to you.
Expect a written estimate within a few days of the inspection, along with a timeline for materials and labor.
How a Certified Inspection Checklist Supports Your Claim
A storm damage inspection checklist built around decking, underlayment, flashing, ventilation, and fastener condition mirrors the same categories FEMA and IBHS point to after major hurricanes. Factory-trained, manufacturer-certified installers, including certifications with Owens Corning, GAF, and Tri County Metals, bring that same structure to a storm inspection, which means the documentation produced lines up with what an adjuster expects to see. A detailed, dated inspection report with clear photos reduces the back-and-forth that slows down disputed claims and gives you a repair plan grounded in what the roof actually needs, not guesswork.
A Contractor’s View on What to Fix First
Safety comes first, then stopping active leaks, then structural repairs. Document everything before you sign anything, and be cautious about assignment of benefits paperwork since it can hand control of your claim to someone else. If you see sagging decking or daylight through the roof, get a professional inspection immediately.
— Ryan
How We Can Help After Storm Damage
We handle storm damage inspections, emergency tarping, and roof repair and replacement for homeowners in the Tampa Bay area, with crews who document findings for insurance purposes.

- Request a storm damage inspection and we’ll walk the roof, attic, and decking with you.
- Ask about emergency tarping if you have active leaks right now.
- Get a written estimate covering roof replacement or targeted repair, whichever the damage calls for.
Reach out through our roofing services page to get started.
FAQ
How do you know if your roof is going bad?
Look for curling, cracked, or missing shingles, granules piling up in the gutters, and daylight visible through the attic decking. Interior signs like ceiling stains or a musty attic smell also point to a roof that’s failing, even without obvious storm damage.
What is the 25% rule in roofing?
The 25% rule is a building code provision in some jurisdictions, including parts of Florida, that can require the entire roof to meet current code if a large portion, often 25% or more, is repaired or replaced within a set period. It can turn a planned partial repair into a full roof replacement, so check with your local building authority before assuming a smaller fix will be approved.
What not to say to an insurance adjuster about your roof?
Avoid guessing at causes, ages, or costs you’re not sure about, and never agree to a settlement figure on the spot. Stick to documented facts: what you observed, when the storm happened, and the photos and records you’ve gathered.
How long after a storm can you report roof damage?
Report it as soon as you discover it. NAIC guidance recommends prompt reporting because early documentation preserves evidence and can speed up the claims process, while waiting risks disputes over whether damage was storm-related.
Sources
- Minimizing wind and water damage: Hurricane Michael recovery advisory (FEMA)
- Understanding roof storm damage and how to inspect (GAF blog)
- What to do before and after a storm (NAIC)
- Florida building code ‘25% rule’ and roofing (J.S. Held)