
Small, open-edge roofs usually do fine with gutters and downspouts or perimeter scuppers. Most commercial and larger residential flat roofs need internal drains routed through interior piping, and very large roofs often make more sense with a siphonic system that moves water full-bore through smaller pipes. Whichever system you choose, three numbers decide whether it actually works: a minimum 1/4 inch per foot slope toward every drain, a secondary overflow drain or scupper set above the primary drain to provide redundancy, and drain sizing matched to your local design storm, not a generic rule of thumb.
TL;DR:
- Drain capacity must be based on the local storm design, typically requiring about 144 square feet per inch of rainfall for each 4-inch drain.
- Every primary drain needs a secondary overflow positioned at least two inches above to prevent structural damage from clogged or blocked primary outlets.
- Proper installation factors include maintaining a minimum slope of 1/4 inch per foot, correct drain placement away from crown points, and ensuring clamping rings are properly tensioned.
- Widespread ponding often indicates a slope deficiency requiring a full roof retrofit, while localized issues can usually be fixed with additional drains or small repairs.
- Routine inspections twice a year, after storms, and maintaining clear strainers and overflow testing are critical to preventing and diagnosing drainage problems.
Table of Contents
- What Are the Main Types of Flat Roof Drainage?
- How Do You Design and Size a Flat Roof Drainage System?
- Installation Details That Prevent Leaks and Pooling
- Is Your Roof Ponding a Maintenance Issue or a Design Problem?
- Maintenance Checklist: How Often Should You Check Flat Roof Drainage?
- What Does It Cost to Fix Flat Roof Ponding?
- How Coastal Roofing & Construction Diagnoses Drainage Problems
- What I’ve Learned Watching Owners Handle Drainage Problems
- Get a Professional Flat Roof Drainage Inspection
- Sources
- FAQ
What Are the Main Types of Flat Roof Drainage?
Every flat roof drainage system is a variation on four basic approaches, and the right one depends almost entirely on roof size, parapet height, and how the building was framed.
Internal drains sit at low points on the roof deck and route water through vertical piping inside the building. They’re the standard choice for most commercial buildings and larger residential flat-roof sections because they don’t depend on a visible edge condition, and they work well with parapet walls that block water from simply running off. The tradeoff is that they need sumps, clamping rings, and interior plumbing runs, which raises installation complexity.
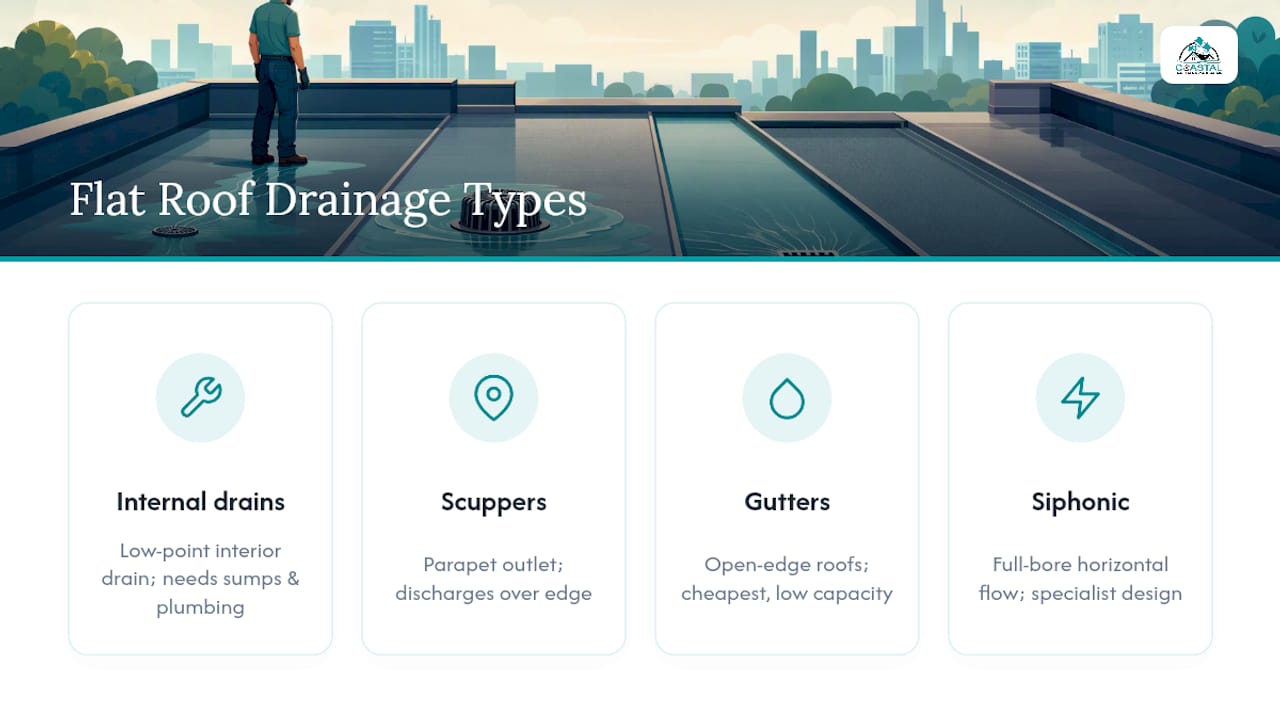
Scuppers are openings cut through a parapet wall that let water discharge off the roof edge, often into a leader and downspout below. They’re effective for perimeter drainage and make excellent secondary/overflow outlets even on roofs where internal drains handle primary flow. Scuppers are simpler to install than internal drains but only work where a parapet exists to cut through.
Gutters and downspouts suit small, open-edge roofs, additions, and porch or carport roofs without parapets. They’re the cheapest system to install and the easiest to retrofit, but they have the least capacity of any option here and clog fastest in areas with heavy tree cover.
Siphonic systems use specially designed outlets that let piping run full-bore and horizontally instead of relying on gravity and continuous slope. Gravity drainage generally works fine for roof areas under a moderate size per drain; beyond that, siphonic systems start making more sense because they cut down the number of outlets and shrink pipe diameters on very large footprints. The catch is that siphonic design requires specialist hydraulic modeling rather than the rule-of-thumb sizing that works for gravity systems.
Most municipalities also cap how fast stormwater can leave a site, so larger commercial projects sometimes need flow-control structures or retention built into the drainage plan, not just the roof-level system.
How Do You Design and Size a Flat Roof Drainage System?
Three design rules govern everything: slope, sizing, and redundancy. Get those right and ponding problems mostly disappear.
Slope comes first. Flat roofs still need a minimum 1/4 inch per foot positive slope toward drains, a figure reflected in IBC and IRC guidance and baked into most manufacturer warranty requirements. On new construction or a full recover, tapered polyiso insulation is the industry-preferred way to build that slope, since it lays down predictable, consistent falls and integrates cleanly with modern single-ply and modified bitumen membranes.
Sizing comes next, and this is where a lot of roofs get shortchanged. Designers use a rule of thumb that a 4-inch drain handles roughly 144 square feet of roof area per inch of rainfall intensity. Rainfall intensity comes from NOAA data for your area, usually expressed as inches per hour for a given storm return period. Here’s how that plays out on a real building.
Say you’re draining a 20,000 square foot commercial roof in an area where the local design storm delivers 4 inches per hour. Divide the roof area by 144, then divide again by the rainfall intensity: 20,000 ÷ 144 ÷ 4 works out to roughly 35 square feet of effective drain capacity needed per inch, which translates to about nine 4-inch drains once you account for typical drain spacing and roof geometry. A building manager doesn’t need to run this math alone. It’s exactly the kind of check a roofing contractor verifies during design review or a pre-purchase inspection.
Redundancy is the rule people skip. Every primary drain should have a secondary overflow path set above the primary to prevent standing water buildup. This isn’t optional detailing. It’s a code-driven requirement tied to IPC Section 1106, and it exists because a single clogged primary drain shouldn’t be able to turn into standing water deep enough to threaten the structure.
| Design element | Minimum requirement | Why it matters |
|---|---|---|
| Roof slope | 1/4 inch per foot | Prevents flat spots where water collects |
| Drain capacity | ~144 sq ft per inch of rainfall per 4" drain | Matches drain count to real storm intensity |
| Overflow protection | Secondary drain/scupper, 2" above primary | Prevents structural overload if primary clogs |
Installation Details That Prevent Leaks and Pooling
Good drainage design still fails if the installation cuts corners. Internal drains depend on a properly formed sump pan, a slight depression around the drain body that keeps water funneling in rather than pooling around the edges. Skip the sump or install it flat, and you’ve built a low spot that ponds no matter how good your slope is everywhere else.
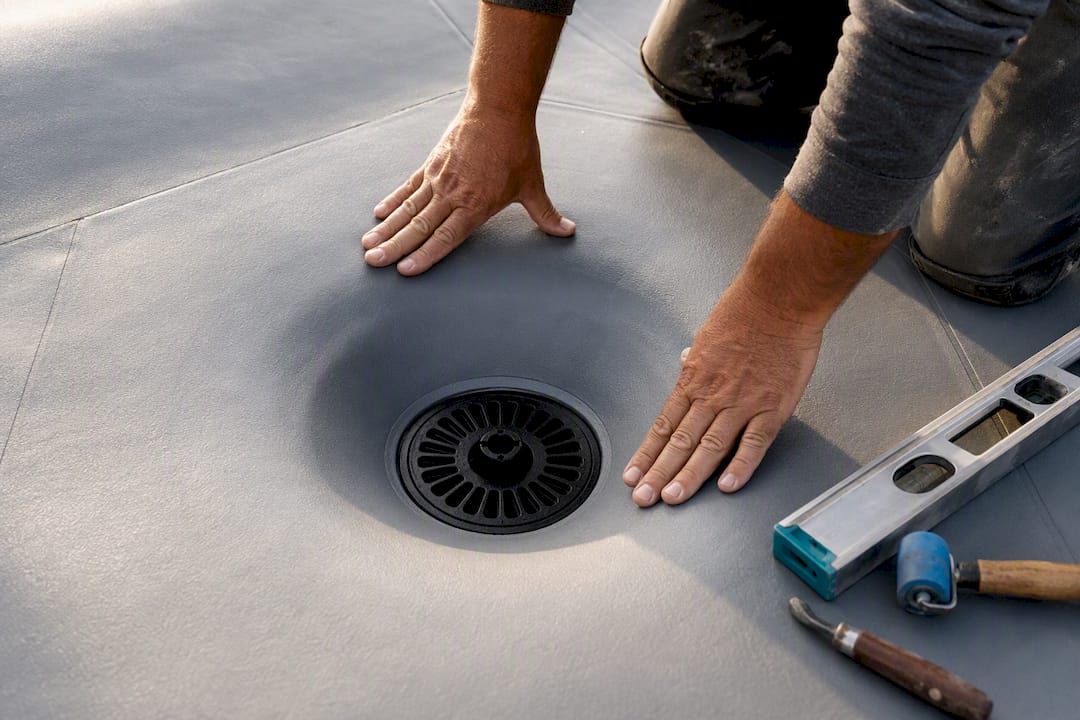
The clamping ring is the other detail that separates a drain that lasts decades from one that leaks within a year. It has to compress the membrane evenly against the drain body, with no wrinkles or gaps in the seal. Roofers who rush this step, or who reuse an old clamping ring that’s lost its tension, set up a slow leak that often doesn’t show up until the ceiling below is already stained.
Placement matters just as much as hardware. A few rules worth knowing:
- Never place a drain at a roof’s structural high point. Water needs somewhere to go, and a drain at a crown just sits there doing nothing.
- Keep drains at least 12 feet from parapet walls where possible, so there’s enough room for proper flashing transitions without cramming pipe fittings against a wall.
- Avoid tapping leader pipes into a drain body at an angle that restricts full flow. This is a common shortcut that reduces effective capacity even when the drain itself is sized correctly.
Pro Tip: If you’re reviewing plans or a recent installation, ask specifically whether insulation was compressed around the drain sump. Compressed insulation is one of the most common hidden causes of a “mystery” ponding spot that shows up months after a re-roof.
Is Your Roof Ponding a Maintenance Issue or a Design Problem?
The National Roofing Contractors Association defines ponding water as standing water that remains on a flat roof for 48 hours or more after rain stops. That 48-hour mark isn’t arbitrary. It’s the threshold most manufacturers use to decide whether ponding voids a membrane warranty, and documented ponding can accelerate membrane degradation and premature membrane failure.
Figuring out why water is sitting there takes a short, methodical check:
- Time it. If water disappears within a day, that’s normal drainage lag, not ponding. Past 48 hours, treat it as a real problem.
- Clean and flow-test every outlet near the standing water. A surprising number of “design” complaints turn out to be a strainer packed with silt and leaf debris.
- Check for blocked or corroded overflow scuppers, since a jammed overflow hides how bad the primary drainage problem really is.
- Measure the actual slope near the ponding area with a level and straightedge, comparing it against the 1/4 inch per foot minimum.
- Look for visible deck deflection, sagging, or a sway in the structure that suggests the framing itself has settled.
If a strainer clears and the water drains normally afterward, you’ve got a maintenance issue you can fix yourself. If the slope measures flat or negative, or the deck shows deflection, that’s a design or structural problem that a cleaning crew can’t touch. Localized ponding in one corner often just needs a small cricket or an added drain nearby. Widespread ponding across large sections of the roof usually points to insufficient slope across the whole deck, which means a tapered retrofit or a broader structural evaluation.
Maintenance Checklist: How Often Should You Check Flat Roof Drainage?
Two scheduled inspections a year, spring and autumn, catch most problems before they become expensive. Add a spot check after any major storm and after any rainfall event exceeding about 25 millimeters per hour, since that’s usually enough to reveal a clog that a light rain would never expose.
Routine maintenance tasks are simple but easy to let slide:
- Clear strainers, scuppers, and gutter outlets of leaves, granules, and silt.
- Physically test overflow drains and scuppers, not just the primary, to confirm they actually activate.
- Inspect clamping rings and surrounding flashing for gaps, cracking, or membrane pull-back.
- Remove silt buildup around sumps, since fine sediment compacts over time and quietly shrinks effective drain capacity.
Removable strainers and leaf guards cut down on how often you need to clear debris by hand, and they’re worth the modest upfront cost on any roof near trees. Keeping dated photos and notes from each inspection also matters more than most owners realize: documented maintenance is often what a manufacturer wants to see before honoring a warranty claim tied to ponding or membrane failure.
Pro Tip: Take a photo of every drain and scupper at each inspection, even when everything looks fine. When a warranty dispute comes up years later, dated photos are worth more than your memory of “it always drained fine.”
Roofs carrying rooftop solar arrays need one more layer of attention, since panel mounts and conduit runs can shed debris directly onto drains below; coordinating maintenance schedules with your solar provider helps catch that before it becomes a clogged strainer.
What Does It Cost to Fix Flat Roof Ponding?
The right fix depends on whether ponding is localized or spread across the whole roof, and the cost spread between those two paths is significant.
Localized ponding in a single corner or near one drain usually calls for an added drain, a new scupper, or a small cricket that redirects water toward an existing outlet. That’s a targeted fix and one of the more affordable ways to solve a real problem.
Widespread ponding across large sections of the roof is a different animal. That points to a slope deficiency across the whole deck, and a tapered polyiso retrofit is usually the permanent answer, since it rebuilds the roof’s fall from scratch. Silicone coatings show up as a stopgap in a lot of guides, and they can buy time on a roof that isn’t ready for a full retrofit, but they don’t fix slope. When a membrane is already near the end of its life on top of a design flaw, a full recover or replacement is often the more economical choice than layering repairs on a roof that will need replacing soon anyway.
How Coastal Roofing & Construction Diagnoses Drainage Problems
Coastal Roofing & Construction is a licensed, insured, family-owned contractor serving flat roofing systems across Tampa Bay, including TPO and modified bitumen installations on both residential and commercial properties.
Our crews approach a ponding complaint the same way every time: a visual survey of the whole roof surface, a slope check with a level at the ponding location, a flow test on the nearest primary and overflow drains, and where needed, a core sample to check whether wet insulation is hiding under the membrane. Every finding gets documented with photos, because that record matters if a warranty claim or insurance question ever comes up. That workflow is why our roof inspections catch drainage design flaws that a simple visual walk-through often misses.
What I’ve Learned Watching Owners Handle Drainage Problems
The mistake I see most often isn’t ignorance. It’s deferral. Owners notice a slow drain, decide it’s not urgent, and by the next storm season it’s a membrane problem instead of a strainer problem. The second most common mistake is never testing the overflow, so the first time anyone learns it’s blocked is during a flood.
A DIY strainer cleaning is fine. A slope reading below 1/4 inch per foot, or any sign of deck deflection, is not a DIY call. That’s when you need someone licensed to look at the structure, not just the surface. And keep your inspection photos. Warranty disputes get decided on documentation, not on how well you remember last spring.
— Ryan
Get a Professional Flat Roof Drainage Inspection
Ponding rarely fixes itself, and guessing at slope with a level from the hardware store only tells you part of the story. The full range of flat roof drainage work includes inspections that measure actual slope and drain capacity, drain and scupper additions for localized problems, tapered insulation retrofits for widespread slope deficiencies, and full recover or replacement when a membrane is past the point of patching.

Every inspection includes a written report with photos of each drain, scupper, and problem area, so you have documentation on hand if a warranty question ever comes up. If your roof has visible standing water past the 48-hour mark, or you’re planning a commercial flat roof installation and want the drainage design checked before construction starts, reach out through our contact page to schedule an inspection and get a straight answer on what your roof actually needs.
Sources
- Ponding water common problems (Flat Roof Report)
- Flat roof drainage design (The Roofing Brief)
- Siphonic drainage systems basics (Schnackel)
- Flat roof drainage systems: key considerations (CapCon Engineering)
FAQ
What are the best drainage options for a flat roof?
Internal drains suit most commercial and larger residential roofs, scuppers work well on parapet roofs, and gutters and downspouts fit small, open-edge roofs; very large roofs sometimes benefit from siphonic systems.
What are three methods of draining flat roofs?
The three most common methods are internal roof drains routed through interior piping, edge scuppers cut through parapet walls, and gutter-and-downspout systems along open roof edges.
How can I improve drainage on a flat roof?
Verify the roof has at least 1/4 inch per foot slope toward drains, confirm a working overflow drain or scupper sits 2 inches above the primary, and clear strainers regularly so debris doesn’t choke existing capacity.
How do houses with flat roofs drain?
Residential flat roofs typically drain through a combination of slight built-in slope, one or more internal drains or scuppers, and gutters at open edges, all sized to move water off the roof before it can pond past 48 hours.
When should I call a contractor instead of cleaning drains myself?
Call a licensed contractor if slope measures below 1/4 inch per foot, if you see deck deflection or sagging, or if ponding persists after strainers and overflows have been cleaned and flow-tested.