
Yes, metal roofs are typically an excellent surface for solar, and for many homeowners, a clamp-on standing-seam mount is the best-case method because it attaches without drilling into the roof. Corrugated and exposed-fastened panels can still work but usually need penetrations, proper flashing, and sealants. Before signing anything, confirm your roof’s age and structural condition, check manufacturer approvals, and document your roof’s state, since federal incentives generally apply to the solar equipment itself, not the roofing material underneath it.
TL;DR:
- Clamp-on standing-seam mounts are the preferred choice because they attach without penetrating the roof, reducing the risk of leaks and simplifying removal.
- Corrugated and exposed-fastened roofs require sealed screw-mounted brackets and proper flashing to prevent leaks, making installation more complex and prone to issues if overlooked.
- Structural condition, roof age, and proper manufacturer approvals must be verified before installation, with a focus on roof repairs or replacement if needed to ensure safety.
- Cost variations depend on roof accessibility, materials, and hardware choice, while federal incentives primarily cover solar equipment, not roofing materials or replacement costs.
- Selecting an experienced installer with proven metal roof experience and clear warranty terms reduces risks of future leaks and warranty disputes.
Table of Contents
- Mounting methods at a glance
- How mounting works by metal roof type
- What happens during a metal roof solar install
- Costs and incentives basics
- Is your roof ready? A practical inspection checklist
- Performance and long-term maintenance
- How to choose an installer for metal roof solar
- A practical take on pairing metal roofing with solar
- Preparing your roof before solar goes on
- Where to go for deeper technical detail
- Sources
- FAQ
Mounting methods at a glance
The right hardware depends on your roof profile, budget, and how much you want to avoid holes in your roofing.
- Clamp-on, non-penetrating: works on standing seam roofs because clamps grip the raised seam instead of piercing the panel, which avoids roof penetrations entirely.
- Rail-based vs. rail-less: rail systems use aluminum rails between clamps and panels, while rail-less direct-attach setups cut material and weight, often speeding up install day.
- Penetrative brackets: corrugated and exposed-fastened metal roofs typically need screw-mounted brackets sealed with flashing and butyl or silicone sealant to stop leaks.
- Integrated solar roofing: factory-built solar shingles or panels that double as the roofing material itself, worth considering mainly during a full roof replacement.
How mounting works by metal roof type
Standing seam roofs are the easiest match for solar. Clamps like the S-5! PVKIT grip the vertical seam mechanically, so no fasteners touch the metal panel itself. That matters because standing seam roofs expand and contract with temperature swings, and a clamp that floats along the seam accommodates that movement without stressing the roof or the mounting hardware. Rail-less systems such as Unirac’s METAL X build on the same idea, cutting the parts count while still fitting standing seam, corrugated, and R-panel profiles.
Corrugated and exposed-fastened roofs work differently. Installers typically use straddle blocks that bridge the ribs or screw-mounted brackets driven into the flat sections, then seal every penetration with formed flashing and rubber washers, often using specialized sealing profiles like an EPDM sealing profile for PV installations to ensure waterproof integrity. Skipping the flashing step is the single most common cause of leaks on this roof type.
Metal tile and batten systems need their own hardware, usually a tile-replacement mount or a batten-compatible bracket designed to match the tile profile’s spacing.
- Match clamp or bracket material to your roof’s metal to avoid galvanic corrosion between dissimilar metals.
- Ask your installer which clamp finish and roof coating combination they’re using before work starts.
Manufacturer guidance lists which metal types are compatible with specific clamp materials, so a mismatch here is a preventable mistake rather than bad luck.
Pro Tip: Ask your installer for the exact clamp model number and check it against the manufacturer’s compatibility chart for your roof’s metal type before installation day.
What happens during a metal roof solar install
A metal roof solar project follows a fairly predictable sequence, though the details shift based on your roof profile.
- Pre-install inspection: the installer checks decking condition, rafter spacing, and existing damage, and should provide a dead-load report along with photos of your roof’s current state.
- Layout and racking: crews mark panel positions, then attach clamps or brackets along the seams or ribs.
- Flashing and sealing: any penetrations get flashed and sealed before wiring begins, this step is where corrugated and exposed-fastened roofs need the most attention.
- Conduit and wiring: cable runs are secured and routed to the inverter location.
- Final inspection: a local permitting inspector or the installer’s own quality check confirms everything is watertight and structurally sound before the system goes live.
Small residential installs often move quickly once permits clear, though permitting delays or unexpected roof repairs can stretch the timeline. Watch for red flags during the walkthrough: visible rust, soft or spongy decking, missing flashing around existing penetrations, or seams that don’t sit flush.
Costs and incentives basics
Price varies with mounting hardware choice, whether the roof needs repairs before installation, panel model and array size, and how accessible your roof is for the crew. A steep, high roof or one that needs re-decking will cost more to work on than a simple, accessible standing seam surface.
On the incentive side, the Residential Clean Energy Credit covers qualified solar panels, inverters, and battery storage, but standard roofing materials and a separate roof replacement generally don’t qualify. Integrated solar roofing that serves as both the roof surface and the energy generator is treated differently and can qualify under IRS guidance.
- Request an itemized quote that separates solar equipment costs from roofing labor and materials.
- Keep every invoice, since a blended bill can complicate your tax filing later.
- Ask your installer to flag which line items are solar-specific before you file.
Roofs are typically designed with an additional dead-load allowance of about 6 pounds per square foot for future PV systems. That number gives structural engineers a planning baseline when deciding whether a roof can carry panels without reinforcement.
Is your roof ready? A practical inspection checklist
Metal roofs often last 40 to 70 years, which usually means the roof will outlive the solar panels mounted on it, avoiding the disruptive removal and reinstall that shingle roofs sometimes require mid-cycle.
Before you schedule an install, walk the roof or have a contractor check for the following:
- Rust spots, especially around fasteners, seams, or valleys.
- Loose or backed-out screws on exposed-fastened panels.
- Patch history or previous repairs that might mask deeper damage.
- Seam condition on standing seam roofs, since damaged seams compromise clamp grip.
Request written structural documentation confirming your roof can accept the added dead load recommended for PV planning, or an engineer’s note if your roof’s age or condition raises questions. Also confirm permit requirements, fall protection anchor points, and clear access routes for the crew.
Pro Tip: Take dated photos of your roof from ground level and up close before any work begins. They become useful documentation if a warranty question comes up later.
Performance and long-term maintenance
The gap between a solar panel and a metal roof creates airflow that helps cool the panels, and cooler panels generally run more efficiently during hot weather than panels mounted flush against a hot surface.
- Check clamp and bracket torque periodically, since thermal cycling can loosen hardware over years.
- Inspect sealant around any penetrations and reseal if it shows cracking.
- Clear debris from seams and gutters so water doesn’t pool near mounting points.
- Clean panels on a schedule that matches local dust, pollen, or coastal salt exposure.
In high-wind regions, mechanical attachments are generally preferred over ballast-only systems, and a wind-load engineering check is worth the cost. When panels or the roof eventually reach end-of-life, removal and reinstallation is straightforward on standing seam roofs, since clamps detach without patching, while exposed-fastened roofs need the old penetrations resealed. For homeowners who want a deeper maintenance routine, a metal roof maintenance checklist covers seasonal upkeep beyond the solar hardware itself.
How to choose an installer for metal roof solar
Not every solar contractor has real metal roof experience, and that gap shows up later as leaks or voided warranties.
- Ask how many metal roof installs the company has completed and request photos of past work.
- Confirm manufacturer certifications, such as training on S-5! or Unirac hardware, along with NABCEP credentials for the crew.
- Request an itemized scope that names the flashing type used and states who warranties any penetrations.
- Ask for references you can call, specifically homeowners with the same roof profile as yours.
- Get warranty language in writing before signing, especially who’s responsible if a leak develops near a mounting point.
| Question to ask | Why it matters |
|---|---|
| How many metal roof solar jobs have you completed | Confirms real experience with your roof type |
| Which manufacturer certifications does your crew hold | Verifies training on the specific hardware they’ll install |
| Who warranties penetrations and flashing work | Protects you if a leak develops later |
| Can you separate roofing and solar costs on the invoice | Matters for tax credit documentation |
Refusal to provide any of the above, or vague answers about warranty responsibility, is a reason to keep looking.
A practical take on pairing metal roofing with solar
Where a standing seam roof is in good shape, clamp-on mounting is the clear choice: no holes, straightforward removal later, and hardware built for the seam. On corrugated or exposed-fastened roofs, the outcome depends entirely on flashing quality and installer experience, more than on the panels themselves. Document your roof’s condition before you get quotes, and separate solar costs from roofing costs on every invoice. Coastal Roofing & Construction’s background in standing seam metal roofing makes it a reasonable resource for homeowners who need roof prep or documentation before bringing in a solar contractor.
— Ryan
Preparing your roof before solar goes on
If your metal roof needs attention before an installer will touch it, that’s roofing work, not solar work, and it’s worth getting right first. Professional roofers install standing seam metal roofing and perform roof inspections with manufacturer-certified, factory-trained crews, which matters when a solar installer asks for documented proof of roof condition before mounting anything.
- Request a roof inspection report you can hand directly to your solar installer.
- Ask about standing seam options if your current roof is nearing the end of its service life.
- Get a written assessment of seam condition, decking, and any repairs needed before panels go up.
If your roof needs repair or replacement before solar makes sense, start with a look at our standing seam metal roofing services or request an inspection through our roof replacement page to get a clear picture of where your roof stands.
Where to go for deeper technical detail
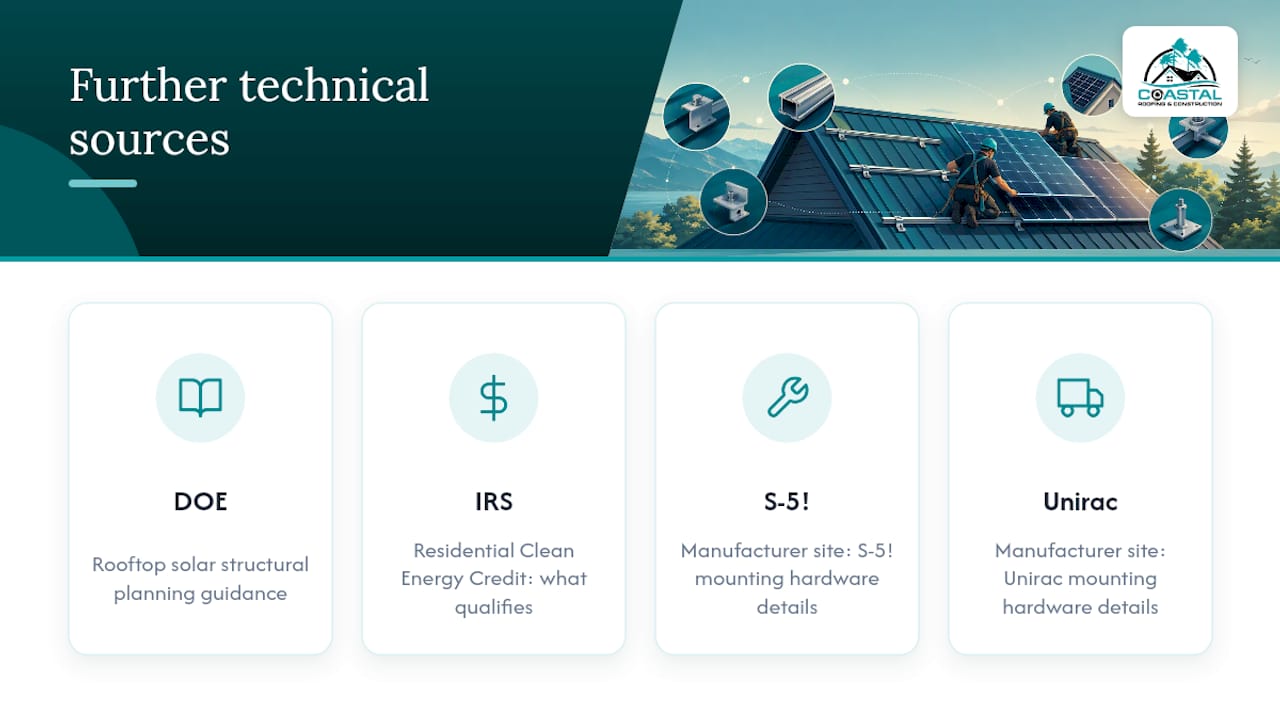
For the technical and legal specifics, go straight to the source. The DOE’s rooftop solar guidance covers structural planning, the IRS Residential Clean Energy Credit page explains what qualifies for the tax credit, and manufacturer sites for S-5! and Unirac detail their mounting hardware.
Sources
- Standing Seam Metal Roof Solar Mounting — non-penetrating systems (PV-Mounts)
- Residential Clean Energy Credit (IRS)
- RERH Solar Electric Guide (U.S. Department of Energy)
FAQ
Is it good to put solar panels on a metal roof?
Yes, metal roofs are generally one of the best surfaces for solar because standing seam profiles allow non-penetrating clamp mounts. Metal roofs also tend to outlast asphalt shingles, reducing the odds you’ll need to remove panels for a re-roof during the panels’ working life.
What roofs can you not put solar panels on?
There’s no roofing material that outright blocks solar installation, but roofs in poor structural condition, with deteriorated decking, or nearing the end of their service life usually need repair or replacement first. A structural check and a dead-load review, as outlined in DOE guidance, should happen before any roof type gets solar hardware.
Is it possible to mount solar panels on a metal roof?
Yes, and standing seam roofs are typically the easiest case since clamp-on systems attach to the seam without drilling. Corrugated and exposed-fastened metal roofs can also work, but they usually require screw-mounted brackets with proper flashing to prevent leaks.
Why is it so hard to sell a house with solar panels?
This depends more on how the panels were financed than on the panels themselves. Leased systems or loans tied to the property can complicate a sale, since buyers may need to qualify to take over the agreement or the seller may need to pay it off first.
Does the Residential Clean Energy Credit cover a new roof installed for solar?
Generally, no. The Residential Clean Energy Credit covers qualified solar equipment like panels, inverters, and battery storage, but standard roofing materials and a separate roof replacement typically don’t qualify, unless the roofing itself is an integrated solar product.