
If water is showing up around your skylight, the first job is figuring out what kind of problem you actually have: condensation, a flashing or roofing failure, or a failed skylight unit. Catch the water, take photos, and protect nearby finishes right away. If the moisture shows up only in cold, dry weather, it’s likely condensation. If it tracks with rain, move on to checking the attic and then a hose test.
TL;DR:
- Most skylight leaks are caused by flashing problems, with wind-driven rain affecting kick-out or stepped flashing most frequently.
- Condensation occurs mainly during cold weather with no rain and shows fogging between glass panes, not active dripping, which indicates a different problem.
- A hose test combined with attic inspection can help locate leaks, but persistent issues or signs of rot require professional diagnosis and repair.
- DIY sealing is suitable for small gaps in units under 15 years old, but re-flashing or full replacement should be handled by professionals for long-term solutions.
- Costs vary from $150 to $3,500 depending on the repair scope, and insurance typically covers sudden damage but not wear and tear; thorough documentation improves claims.
Table of Contents
- How to tell a real leak from condensation
- Common causes of skylight leaks and their telltale patterns
- Step-by-step diagnosis you can do safely
- DIY repair options and where the safety limits are
- When to call a professional and what it costs
- Maintenance checklist to prevent future leaks
- What a certified roofing inspection actually checks
- A straight take on handling a skylight leak
- Getting a professional inspection through Coastal Roofing & Construction
- Sources
- FAQ
How to tell a real leak from condensation
Timing tells you almost everything. Moisture that appears during or right after rain points to a true leak, while fogging or dripping that shows up on cold mornings, even with no rain, is usually condensation forming on the glass or shaft walls. Where the water lands also matters: drips at the top of the shaft often trace to the head flashing, side drips point to step flashing or sealant joints, and water pooling at the bottom usually means it traveled down the shaft from somewhere higher up.
While you’re inspecting, check these spots:
- Interior shaft walls: look for staining, peeling paint, or soft drywall.
- The skylight curb: check for gaps, cracks, or separated corners.
- Attic framing near the skylight: scan for dark stains, rot, or damp insulation.
- Ceiling texture around the opening: bubbling or sagging suggests water has been sitting for a while.
Once you spot active dripping, put a bucket or towel underneath, cover nearby furniture or flooring with plastic, and photograph everything before you clean up. Those photos matter later if you end up filing an insurance claim.
Common causes of skylight leaks and their telltale patterns
Most skylight leaks trace back to one of a handful of causes, and each leaves its own signature. Flashing problems are the most frequent culprit: a kicked-out head flashing or a stepped flashing piece that has pulled loose lets water in during rain, especially wind-driven rain. Gasket or insulated glass unit (IGU) failure shows up as fogging or moisture between the panes rather than drips, since the seal between the glass layers has broken down. Cracked or separated curb corners let water track down the shaft wall instead of shedding off the roof, and framing that has shifted slightly can open gaps that are easy to miss from the ground.
Watch for these patterns:
- Flashing failure: leaks correlate with wind direction and rain intensity.
- IGU or gasket failure: condensation-like fogging between glass panes, not active dripping.
- Curb cracks: staining concentrated at one corner or edge of the shaft.
- Blocked weep holes: water backs up and overflows instead of draining, sometimes worsened by ice damming in colder climates.
Step-by-step diagnosis you can do safely
Diagnosing the source correctly is what keeps you from paying for the wrong repair. A practical diagnosis sequence starts with pattern matching, then narrows down with a controlled hose test.
- Rule out condensation first. Check whether the moisture appears only in cold weather with no rain, and look for fogging between glass panes rather than drips.
- Trace the drip location. Top-of-shaft drips usually mean head flashing, side drips point to step flashing or sealant, and bottom pooling suggests water traveling down from above.
- Inspect the attic. Photograph the curb, rafters, and sheathing near the skylight, and look for dark staining, soft wood, or damp insulation that shows where water has been entering.
- Run a hose test. Have someone watch inside while you spray the downhill apron first, then the sides, then the uphill head, then the glass itself, running each zone for about five minutes before moving to the next.
- Stop if you see rot or multiple entry points. That’s a sign the problem is bigger than a single sealant gap.
Pro Tip: Run the hose test on a dry day with a helper inside watching the ceiling, and never climb onto a wet or steeply pitched roof to do it yourself.
If your attic shows rot, more than one wet spot, or you’re not comfortable being on the roof, this is the point to call a professional rather than keep experimenting.
DIY repair options and where the safety limits are
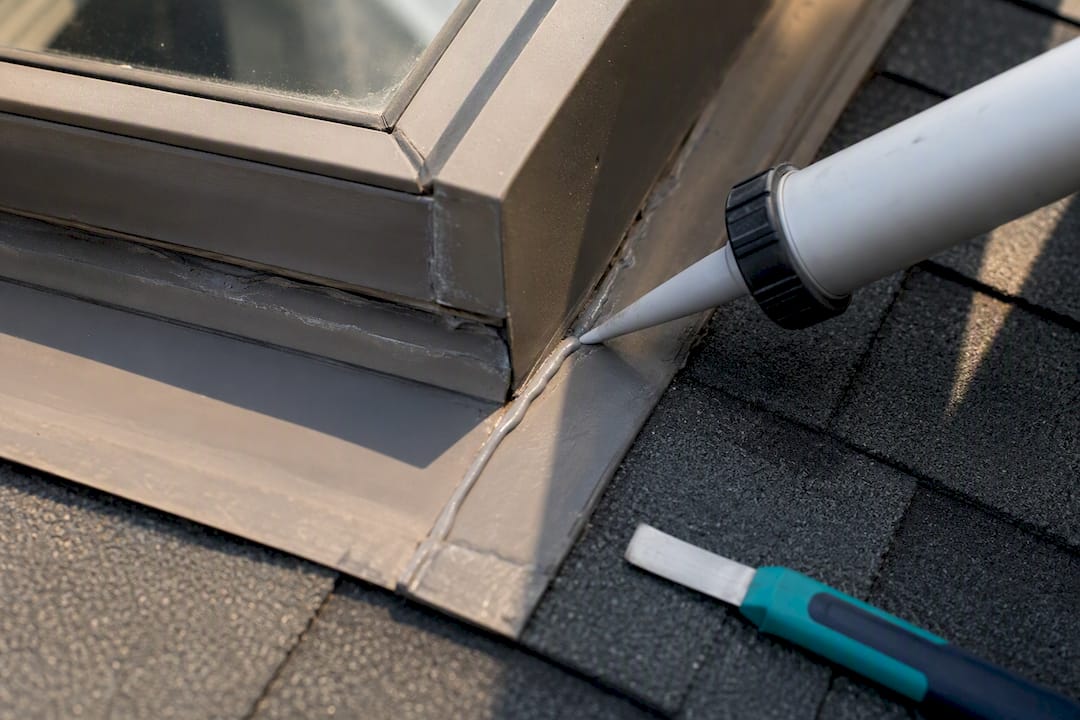
Some skylight problems are genuinely simple to fix. Clearing debris away from the frame, opening blocked weep holes, and replacing worn weatherstripping on an operable skylight are all reasonable weekend jobs. Resealing small exterior joints can work too, but the product matters: a dedicated roof flashing sealant designed for that application holds up far better than general-purpose silicone or butyl tape, which can shrink, crack, or fail to bond properly with metal flashing.
Keep these limits in mind:
- Reseal only small, localized gaps, not widespread flashing separation.
- Never caulk over a weep hole, even accidentally, since that traps water instead of draining it.
- Tarp a leaking skylight temporarily by anchoring the tarp well above the shaft on solid roofing, never taping it directly to the glass.
- Avoid steep pitches or wet conditions entirely; a fall risk isn’t worth a $20 tube of sealant.
A reseal makes sense on a younger unit with a visible sealant gap, roughly under 15 years old. Corroded, kicked-out, or missing flashing calls for re-flashing rather than more caulk, and DIY sealing carries real risk when the underlying rot or flashing damage isn’t visible from a quick look.
Pro Tip: If you’ve resealed the same spot twice and it’s still leaking, the problem isn’t the sealant, it’s the flashing underneath.
When to call a professional and what it costs
Some signs mean it’s time to stop troubleshooting and book an inspection. Persistent leaks after a reseal, fogging inside the glass, a cracked curb, visible rot, or leaks that show up in more than one type of weather all point to a problem bigger than a caulk job.
- Reseal or minor repairs: roughly $150 to $800.
- Re-flashing with a flashing kit: roughly $300 to $1,000.
- Full skylight replacement: roughly $900 to $3,500 depending on the unit and scope.
On insurance, standard homeowners policies generally cover damage from a sudden covered peril like wind or hail, but they typically exclude wear and tear or damage from deferred maintenance. Document the damage with photos and get an adjuster out before you start repairs. When you book a contractor, ask what they found during the inspection, whether they’ll use a manufacturer flashing kit, and what warranty comes with the work.
Maintenance checklist to prevent future leaks
A short seasonal routine catches most problems before they become interior damage. Walk the roofline each spring and fall and check the flashing, sealant lines, and shingles around the skylight for gaps or lifting. Clear leaves and debris from the uphill side, since buildup there redirects water toward seams instead of away from them.
- Check attic ventilation and bathroom or kitchen exhaust, since poor airflow raises indoor humidity and creates condensation that mimics a leak.
- Keep weep holes clear so water can drain instead of backing up.
- Inspect gaskets on operable units for cracking or shrinkage.
- Plan for replacement if the IGU is fogged or the unit is near or past 15 to 20 years old, especially if you’re already having other roof work done.
What a certified roofing inspection actually checks
A manufacturer-certified inspection goes beyond a visual glance from the ground. Technicians check curb condition, how the underlayment and flashing are layered, whether weeps are draining, the state of the gasket or IGU, and how water moves across the roof near the skylight.
- Correct flashing layering matters because flashing installed bottom-up with self-adhered membrane sheds water properly instead of trapping it.
- Manufacturer flashing kits paired with certified installation hold up better over time than improvised sealant fixes.
- An inspection report should note exactly what was found and give you a clear estimate for the fix, not just a quote.
A straight take on handling a skylight leak
Protect your interior first, diagnose before you spend a dollar on repairs, and match the fix to the actual failure, not the cheapest guess. A quick tube of caulk might buy you a season, but flashing repaired correctly by a certified installer tends to outlast it by years.
— Ryan
Getting a professional inspection through Coastal Roofing & Construction
If a hose test or attic check points to flashing or a failing unit, a professional roofing company can handle inspections, flashing repair, and full skylight or roof replacement for homeowners in the area. Experienced teams with manufacturer certifications install flashing properly, layered correctly instead of patched with sealant.

Reach out through our roof repair services page to request an inspection, and a technician will walk the roof, check the attic side of the skylight, and give you a written estimate before any work starts.
Sources
- Which disasters are covered by homeowners insurance? | Triple-I
- Inspecting skylights, water damage, and infiltration | Building Science Education
- Skylight Leak: 7 Sources, Diagnosis & Repair Cost | The Roofing Brief
- How to repair a leaking skylight | Family Handyman
FAQ
Is it common for skylights to leak?
Skylight leaks are a frequently reported roofing problem, and close to half of them trace back to flashing or roof issues rather than the skylight unit itself. That’s why diagnosing the source before repairing anything saves money and avoids replacing a unit that was never the problem.
Does homeowners insurance cover skylight leaks?
Most standard homeowners policies cover skylight damage when it’s caused by a sudden peril like wind or hail, but they generally exclude damage from wear and tear or lack of maintenance. Document the leak with photos and get an adjuster’s assessment before starting repairs.
What is the best way to seal a leaky skylight?
For a small, localized gap on a unit under about 15 years old, a dedicated roof flashing sealant applied over clean, dry metal works better than general-purpose silicone or butyl. If the flashing itself is corroded, kicked out, or missing sections, re-flashing with a manufacturer kit is the fix, not more sealant.