
Call a licensed emergency tarping crew now if your roof has structural damage, exposed decking, or damage you can’t reach safely; only tarp it yourself if the area is low-slope, dry, and accessible without a ladder over 8 feet or a steep climb. Photograph the damage from the ground before doing anything else. That photo record protects your insurance claim regardless of who ends up on the roof.
TL;DR:
- Tarping is critical for active leaks, structural breaches, or visible daylight in the attic, especially when water is entering the building.
- DIY tarping is only safe on low-slope roofs in calm, dry weather with minimal pitch, a helper, and no roof heights over 8 feet.
- Professional crews use heavy-duty, UV-rated tarps and engineered anchoring methods that last through storm cycles, unlike typical DIY solutions.
- Insurance often covers emergency tarping as mitigation if homeowners document damage thoroughly before and after installation.
- Tarp lifespan usually ranges from 30 to 90 days, requiring regular inspection and immediate scheduling of permanent repairs after insurance approval.
Table of Contents
- When Do You Need Emergency Roof Tarping?
- What Should You Do Right Now?
- Can You Tarp a Roof Yourself? Safe Conditions and Steps
- How Do Professional Crews Tarp a Roof Differently?
- How Much Does Emergency Roof Tarping Cost?
- How Long Does a Roof Tarp Actually Last?
- Why Trust Coastal Roofing & Construction for Emergency Tarping?
- What Actually Matters Most After Storm Damage?
- Need Emergency Roof Tarping? Here’s What to Do
- Sources
When Do You Need Emergency Roof Tarping?
Not every roof problem after a storm needs a tarp within the hour, but a lot of them do, and the difference usually comes down to whether water is actively getting into the structure. Wind and hail that lift or crack shingles, a fallen tree limb punching through decking, fire damage that burns a hole clean through, or missing sections of decking after a bad storm all qualify as tarp-now situations.
The clock matters more than most homeowners realize. Interior damage compounds fast: drywall wicks water within hours, insulation soaks and loses its R-value, and in Florida’s humidity, mold colonies can start forming in as little as 24 to 48 hours in wet cavities. Waiting a day to “see how bad it is” often turns a $500 tarp job into a $5,000 drywall and mold remediation bill.
There’s also a claims angle most people miss. Insurers expect homeowners to take reasonable steps to prevent further damage after an initial loss, a concept adjusters call mitigation. Skipping that step can complicate a claim later.
Situations that call for tarping right away:
- Active roof leaks during or after a storm
- Missing shingles, tiles, or exposed underlayment
- Tree limbs or debris that punched through the roof deck
- Fire or chimney damage that opened a hole to the sky
- Any breach where you can see daylight from inside the attic
What Should You Do Right Now?
Your priorities in the first hour are safety, then mitigation, then documentation. Work through them in that order.
- Get people out if the structure feels unsafe. Sagging ceilings, cracking sounds, or visible structural movement mean you leave and call for help, not that you grab a tarp.
- Cut power near water intrusion. If water is dripping near outlets, light fixtures, or the electrical panel, shut off that circuit or the main breaker if you’re unsure which one.
- Skip the attic if the ceiling is wet or soft. A saturated ceiling can collapse under your weight. Wait for a professional with the right equipment.
- Contain the interior damage. Move furniture and electronics out of the drip zone, set buckets under active leaks, and lay towels or plastic sheeting to catch runoff.
- Photograph everything before you touch it. Interior water stains, ceiling sag, and the exterior breach all need to be documented for your insurer.
- Hold off on rooftop work in wind, rain, or after dark. Wet shingles and gusty conditions are how DIY tarping jobs turn into ER visits.
- Don’t attempt a steep or multi-story roof alone. If it’s more than one story or has a pitch steeper than about 4:12, that’s a job for someone with fall protection, per OSHA’s ladder and roof safety guidance.
- Leave large fallen trees to professionals. A tree resting on a roof can be under tension; cutting it wrong can cause it to shift suddenly.
Can You Tarp a Roof Yourself? Safe Conditions and Steps
DIY tarping works for small, accessible breaches on a low-slope roof in calm, dry weather, with a helper on the ground and no ladder work above one story. If any of those conditions are missing, call a pro instead. A tarp installed badly during a lull between storm bands can rip loose in the next gust and leave you worse off than before.
Before you climb anything, run this checklist:
- Roof pitch is low enough to stand on without sliding
- Weather is calm, dry, and expected to stay that way for the next few hours
- You have a helper on the ground and, ideally, a harness anchored to a stable point
- The damaged area is reachable without a ladder taller than 8 feet
**Materials that actually hold up include UV-rated woven polyethylene tarps with sufficient thickness for durability (thin painter’s tarps tear within days), 2×4 furring strips, 3-inch deck screws, a cordless drill, and sandbags if the roof is too low-slope for battens to grip well. Home Depot’s tarping guidance recommends nothing thinner than 6 mil, and that’s a good floor, not a roof.
Step-by-step:
- Assess the damage from the ground first with binoculars if possible.
- Size the tarp so it extends 3 to 4 feet past the damaged area on all sides, and drape it over the ridge line if the breach is near the peak so water sheds off both sides.
- Sandwich the top edge between two 2×4 boards and screw through both boards into solid decking every 16 inches, per the Roofs.
- Repeat the batten-and-screw approach along the bottom and sides.
- Add rope tied to secure anchor points as a backup against wind uplift.
- Check the attic after the first rain to confirm the seal held.
Pro Tip: Never screw a tarp directly through single layers of shingle without a batten board underneath. The board spreads the load so wind doesn’t rip the screw straight through the tarp fabric.
How Do Professional Crews Tarp a Roof Differently?
Licensed crews solve the same problem with heavier materials, engineered anchoring, and a paper trail your insurer will actually accept. The difference shows up the first time a second storm band rolls through.
A professional call typically starts with 24/7 dispatch and a safe-access assessment. If a tree is resting on the structure, crews stabilize or remove it before anyone touches the roof deck, following the same OSHA fall-protection standards that govern any elevated roof work.
From there, established tarping services use heavy-duty UV-rated tarps anchored with furring strips screwed into solid decking, or non-penetrative systems like weighted TarpBags where drilling into the roof isn’t advisable. That distinction matters on tile and low-slope roofs, where an extra screw hole can create a new leak path instead of fixing the old one.
Homeowner DIY tarps often fail within the first week once wind returns, usually because the tarp was too thin or the anchoring wasn’t secure. A properly battened, professional-grade install is built to survive the next weather band, not just the current lull.
What you should get in return for the invoice:
- Before-and-after photos of the damage and the completed tarp
- An itemized invoice describing materials and labor
- A written scope of work an adjuster can reference
- A clear path from emergency mitigation into permanent repair scheduling
Crews serving hurricane-prone areas often pre-stage tarps and hardware ahead of storm season specifically so they can deploy across multiple properties without waiting on supply runs, according to WrightWay’s emergency tarping operations.
How Much Does Emergency Roof Tarping Cost?
Emergency tarping typically runs anywhere from roughly $175 for a small patch to $2,500 or more for a full-roof cover, according to industry cost data from Florida tarping providers. Where you land in that range depends on square footage damaged, how many stories the crew has to work at, roof pitch, and whether debris has to be cleared before the tarp goes on.
Most insurers treat emergency tarping as mitigation, meaning they expect you to do it and often reimburse it, provided you document the work properly. That documentation is where claims get approved or delayed.
Save and hand your adjuster:
- Photos of the damage before any tarp went on
- Photos of the completed tarp installation
- An itemized invoice with the date and scope of work
- The contractor’s license and insurance information
Ask upfront whether the contractor offers direct billing to your insurer. Many do, and it removes one more thing you have to chase during an already stressful week. A storm damage insurance claim checklist can help you keep every document organized before the adjuster ever calls.
How Long Does a Roof Tarp Actually Last?
A tarp is mitigation, not a repair. Most installs hold up for about 30 to 90 days before UV exposure and wind cycling degrade the material enough that replacement or reinforcement becomes necessary. Heavy-duty battened installs on stable roofs sometimes stretch longer, but sun bleaching and repeated flapping in the wind eventually break down even good tarp fabric.
Reinspect the tarp after every subsequent storm, not just once and forget it. If a band of weather rolls through and you hear the tarp snapping loudly at night, that’s a sign an edge has worked loose. Once your insurance claim is moving, schedule the permanent repair as soon as the timeline allows. Delaying it because “the tarp is holding” is how a temporary fix turns into a second, avoidable roof failure.
- Typical tarp lifespan: 30 to 90 days
- Reinspect after every storm event, not on a calendar schedule
- Permanent repair should be scheduled the moment insurance approval comes through
Why Trust Coastal Roofing & Construction for Emergency Tarping?
Coastal Roofing & Construction is licensed, insured, and manufacturer-certified with Owens Corning, GAF, and Tri County Metals, which means our crews install to standards those manufacturers require, not just industry minimums. We serve Pinellas, Hillsborough, and Pasco counties, and our teams stay staged for storm season so response times don’t slip when multiple homes need help at once.
On an emergency call, we triage same-day when conditions are safe, photograph everything for your insurer, and hand you a clear path from tarp to permanent roof repair or replacement. Before hiring anyone during a storm rush, check our guide on spotting roofing scams after storms. Storm chasers move into damaged neighborhoods fast, and a rushed decision can cost more than the original damage.
What Actually Matters Most After Storm Damage?
Most emergency tarping advice online is written like a checklist and stops there. What it skips is the judgment call in the middle: deciding whether your specific situation is a “grab a tarp” problem or a “get off the roof and call someone” problem. That decision, made in the first 30 minutes, shapes everything that follows.
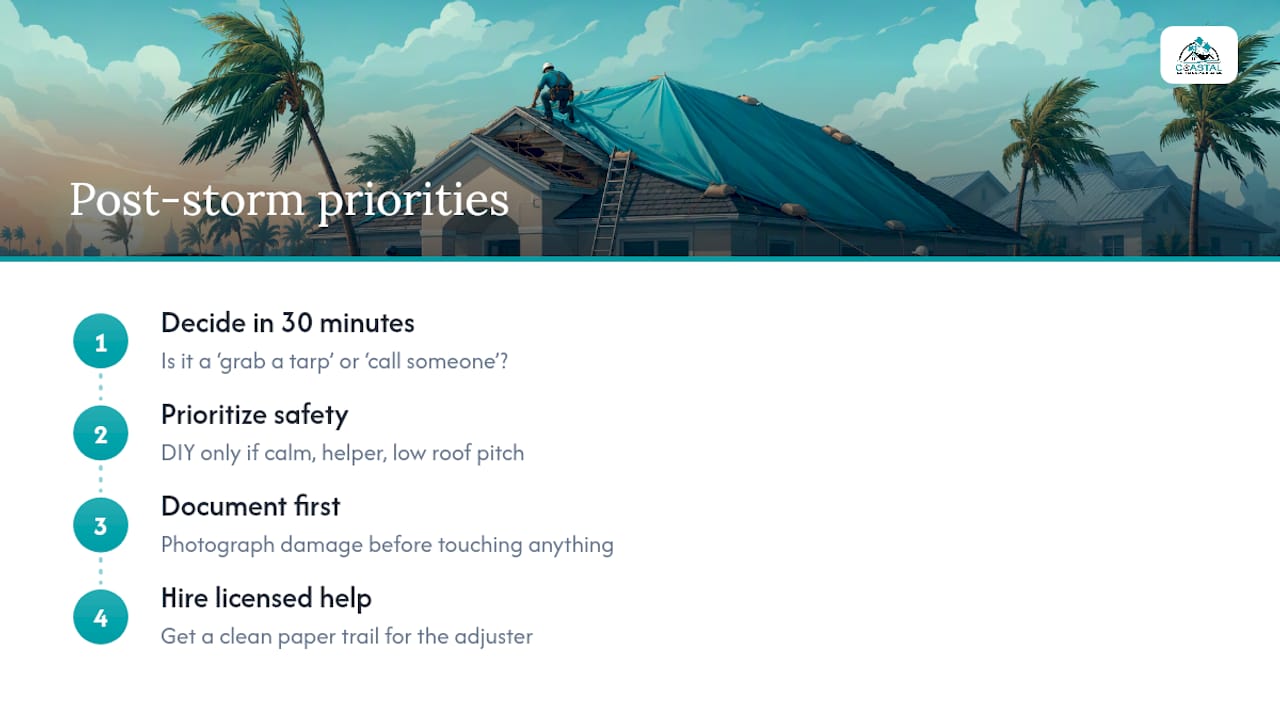
The conventional wisdom oversells DIY capability. A lot of tarp-yourself guides assume calm weather, a helper, and a roof pitch gentle enough to stand on, conditions that frankly don’t describe most storm-damaged roofs in the hours right after a hurricane band passes through. If your roof doesn’t meet every item on that checklist, it doesn’t matter how good your materials are.
Documentation gets treated as an afterthought when it should be step two, right after safety. The homeowners who recover fastest from storm damage aren’t the ones who tarp perfectly. They’re the ones who photographed the damage before touching anything and hired someone who could hand them a clean paper trail for the adjuster.
— Ryan
Need Emergency Roof Tarping? Here’s What to Do
Storm chasers and unlicensed crews flood Tampa Bay after every major weather event, offering rushed tarp jobs with no documentation and no insurance backing them up. Coastal Roofing & Construction gives you the opposite: a licensed, manufacturer-certified crew that shows up with photo documentation and an itemized invoice built for your adjuster, not just a tarp and a handshake.

When you call, have your address, a description of the damage, your best contact number, and your insurance information ready. We’ll walk you through what we can safely assess same-day, get a tarp on the affected area when conditions allow, and document every step for your claim. From there, we help you move straight into a permanent fix, whether that’s a targeted roof repair or a full roof replacement. Browse our completed projects to see the standard we hold ourselves to, then call us to schedule your emergency assessment.
Sources
- OSHA Ladder Safety guidance (OSHA3926)
- How to tarp a roof | The Home Depot
- Roofs
- Emergency Roof Tarping Services | Tarpers
- Emergency Tarping Services | WrightWay