
Protecting landscaping during roof replacement is defined as the set of proactive measures homeowners take to shield plants, trees, lawns, and garden features from debris, foot traffic, and soil compaction caused by roofing crews. A roof replacement is one of the most disruptive home improvement projects your yard will face. Without a clear plan, falling shingles, roofing nails, and heavy equipment can destroy mature shrubs, compact root zones, and leave your lawn looking like a construction site. The good news is that most damage is preventable with the right preparation and the right contractor.
How to protect landscaping during roof replacement: pre-project steps
The most effective tool for protecting your landscaping is a detailed walkthrough with your contractor before work begins. Pointing out valued plants and hidden hazards before the crew arrives dramatically improves protection outcomes. Walk the full perimeter of your home and treat this meeting as a planning session, not a formality.
Follow these steps before your roofing crew shows up:
- Mark all hidden hazards. Use bright flags or spray paint to identify sprinkler heads, lighting, and buried lines before the crew arrives. A nail gun or ladder leg can destroy an irrigation system in seconds.
- Remove or relocate potted plants and yard ornaments. Move anything within 10 feet of the home’s foundation. Pots, statues, and garden art are easy to relocate and impossible to un-break.
- Mow your lawn to approximately 2 inches. This height facilitates magnetic sweeper cleanup of roofing nails after the job. Taller grass hides nails; shorter grass makes them easier to find and remove.
- Trim overhanging branches or hire an arborist. Branches that hang over the roofline create hazards for workers and get damaged by ladders. Consulting an arborist before roofing ensures healthy pruning and proper clearance for equipment.
- Establish a Tree Protection Zone (TPZ). Experts recommend 6–10 feet of clearance from the roof edge, or 1 foot per inch of trunk diameter, for high-value trees. Mark this zone clearly so crew members know where not to walk or stage materials.
- Agree on debris-drop zones and crew pathways. Decide with your contractor exactly where the dumpster goes, where materials will be staged, and which paths workers will use. Written agreement prevents misunderstandings on day one.
Pro Tip: Take dated photos of your entire yard before work starts. If a dispute arises about damage, you have clear before-and-after documentation.
How do you physically shield plants and lawn during active roofing work?

Physical barriers are the difference between a garden that survives a roof replacement and one that does not. Professional roofing crews use specialized mesh systems and plywood to capture up to 99% of falling debris while still allowing airflow to reach plants below. That combination of debris capture and ventilation is the key standard to demand from any crew working above your landscaping.
Here is what effective physical protection looks like in practice:
- Use breathable mesh or vented tarps, never solid plastic. Heavy-duty plastic tarps trap heat and can cook plants on a warm Florida day. Breathable mesh covers protect without creating a heat trap.
- Build vented tarp tents over delicate shrubs. Use a simple frame to lift the tarp off the plant canopy. This creates an air gap that prevents heat buildup while still blocking falling debris.
- Deploy the “ski jump” technique for foundation plants. Plywood sheets angled away from the roofline act as rigid debris slides, directing falling shingles and nails safely away from plants at the base of the wall.
- Install temporary netting around high-value trees and shrubs. Lightweight screen netting catches granules and small debris without blocking light for extended periods.
- Lay plywood walk paths across the yard. Soil compaction from foot traffic causes more long-term damage than falling debris. Plywood sheets distribute weight and protect root zones.
- Position the dumpster on the driveway or street, never on the lawn. A loaded dumpster compresses soil and kills grass roots within days.
- Require daily debris cleanup. Roofing nails left overnight attract animals, puncture tires, and embed in soil where they rust and leach metal into plant root zones.
Pro Tip: Ask your contractor specifically whether they use a magnetic roller after each work day. This tool picks up stray nails from grass and gravel that a visual sweep will miss.
The table below summarizes the most common protection methods and their primary purpose:
| Protection method | Primary purpose |
|---|---|
| Breathable mesh systems | Block debris while allowing airflow and light |
| Plywood walk paths | Prevent soil compaction and root zone damage |
| Ski jump plywood slides | Direct falling debris away from foundation plants |
| Vented tarp tents | Shield delicate shrubs from debris and heat |
| Temporary netting | Catch granules and small debris around trees |
| Magnetic roller sweeper | Remove roofing nails from lawn and gravel |
What mistakes cause the most landscaping damage during roofing projects?
Most landscaping damage during a roof replacement is not caused by the roofing work itself. It is caused by avoidable mistakes in planning and communication. Knowing these pitfalls ahead of time puts you in control.
- Using solid plastic tarps in warm climates. In Florida’s heat, a plastic tarp over a shrub acts like a greenhouse. Plants can show heat stress within hours. Always specify breathable covers in your pre-project agreement.
- Ignoring the root zone. Roots extend well beyond the visible canopy of a tree. Crew members walking repeatedly over the same path compact soil, cut off oxygen to roots, and cause damage that shows up weeks after the project ends.
- Failing to brief the crew about fragile areas. A pre-project walkthrough with the foreman is not enough if the information does not reach every worker on site. Ask your contractor to mark fragile zones with visible tape or signage that the whole crew can see.
- Skipping the final cleanup inspection. Roofing granules, old nails, and torn underlayment left in garden beds create ongoing problems. Granules alter soil pH, and rusting nails release iron compounds that can harm sensitive plants.
- Underestimating damage to soft plants. Annuals, perennials, and ground covers are far more vulnerable than established shrubs. Even a single dropped bundle of shingles can flatten a flower bed that took a season to grow.
“Homeowners who communicate clearly with their contractor about which plants matter most consistently see better outcomes. The crew cannot protect what they do not know is valuable. A five-minute conversation before day one is worth more than any tarp.”
Honest contractor communication is not just good manners. It is the single most reliable way to reduce landscaping disappointment after a roofing project. Choose a contractor who asks about your yard before they ask about your shingles.
What post-replacement care does landscaping need to recover?
Recovery care after a roof replacement is just as important as the protection measures taken during the work. Prompt maintenance after roof work is the deciding factor in long-term plant health. Follow these steps as soon as the crew leaves for the final time:
- Remove all protective coverings immediately. Tarps and mesh left in place block light and trap moisture. Remove them the same day the crew finishes.
- Deep water the entire yard. A thorough watering washes roofing dust, granules, and chemical residue off leaves and out of the soil. Do this within 24 hours of project completion.
- Inspect and prune broken branches. Walk every tree and shrub and cut clean any branches that were snapped or scraped. Clean cuts heal faster than torn wood and reduce disease risk.
- Aerate and fertilize compacted soil. If crew members walked repeatedly over lawn areas, use a core aerator to restore oxygen flow to roots. Follow with a balanced fertilizer to support recovery.
- Monitor plants for delayed stress signs over the following 4–6 weeks. Yellowing leaves, wilting, and stunted growth can appear weeks after the project ends. If you see these signs, consult a licensed arborist or horticulturist before the damage becomes permanent.
The importance of post-project cleaning and pruning for plant health cannot be overstated. Many homeowners focus entirely on protection during the project and neglect the recovery phase, which is where lasting damage often sets in.
Key Takeaways
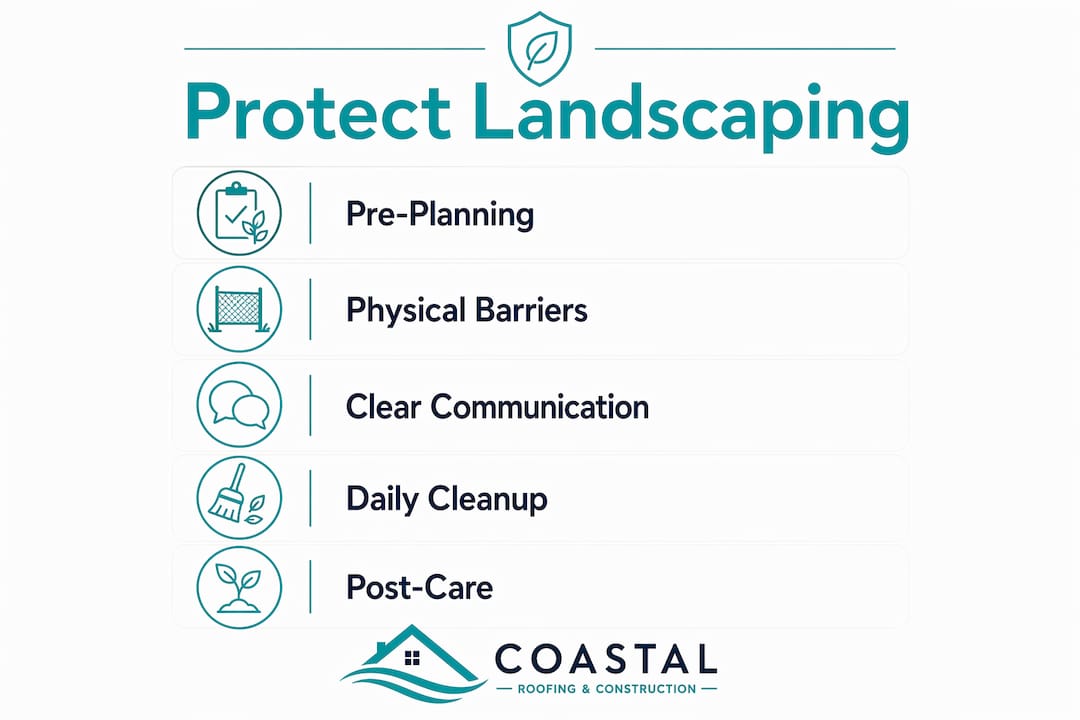
Protecting your landscaping during a roof replacement requires pre-project planning, physical barriers, clear crew communication, and prompt post-project recovery care.
| Point | Details |
|---|---|
| Pre-project walkthrough | Walk the yard with your contractor and mark all hazards before work begins. |
| Breathable covers only | Use mesh or vented tarps instead of plastic to prevent heat damage to plants. |
| Prevent soil compaction | Lay plywood walk paths and keep the dumpster off the lawn to protect root zones. |
| Daily debris cleanup | Require nail sweeping and debris removal each day to avoid lasting soil and plant damage. |
| Post-project recovery | Deep water, prune, aerate, and monitor plants for 4–6 weeks after the project ends. |
What I have learned from watching homeowners protect their yards
After years of working on roof replacements across the Tampa Bay area, the pattern I see most often is this: homeowners who treat landscaping protection as an afterthought end up with the most regret. They assume the contractor will handle it automatically. Sometimes that assumption is correct. Often it is not.
The homeowners who come out of a roof replacement with their yards intact are the ones who show up to the pre-project walkthrough with a list. They know which rose bush cost them $200, which oak tree took 15 years to grow, and exactly where the irrigation lines run. That specificity gives the crew something concrete to work around.
I also want to be honest about something most guides skip: some minor damage is almost unavoidable. A stray granule will land in a flower bed. A worker will step off the plywood path once. Accepting that reality upfront, and communicating it clearly with your contractor, sets the right expectations for everyone. The goal is not a perfect yard. The goal is a yard that recovers quickly.
The contractors worth hiring are the ones who bring this conversation to you before you have to ask. At Coastalroofingfla, the pre-project walkthrough is a standard part of every residential roof replacement we perform. That conversation is where good outcomes start.
— Ryan
Coastalroofingfla’s approach to protecting your property during roof replacement
Coastalroofingfla builds landscaping protection into every project from the first site visit. The team conducts a full pre-project walkthrough to identify fragile plants, mark irrigation systems, and agree on debris-drop zones before a single shingle is removed.

Coastalroofingfla’s crews use breathable mesh systems, plywood walk paths, and daily magnetic nail sweeps as standard practice on every shingle and metal roofing project across Pinellas, Hillsborough, and Pasco counties. If you want a roofing contractor who treats your yard with the same care as your roof, visit the Coastalroofingfla FAQ page or call to schedule your consultation today.
FAQ
How do I protect plants from falling debris during roofing?
Use breathable mesh covers or vented tarp tents over shrubs and plants near the roofline. Professional crews can capture up to 99% of falling debris using mesh systems and angled plywood slides.
What is the biggest cause of landscaping damage during a roof replacement?
Soil compaction from foot traffic causes more long-term damage than falling debris. Plywood walk paths and designated no-go zones are the most effective countermeasure.
Should I mow my lawn before a roof replacement?
Mow to approximately 2 inches before the project starts. This height makes it easier for magnetic sweepers to find and remove roofing nails from the grass after each workday.
How long should I monitor my plants after a roof replacement?
Monitor plants for at least 4–6 weeks after the project ends. Stress signs like yellowing leaves and wilting can appear weeks after the work is complete, especially in trees with compacted root zones.
Can plastic tarps damage plants during roofing work?
Yes. Solid plastic tarps trap heat and can cause rapid heat stress, especially in warm climates like Florida. Always request breathable mesh covers or vented tarp tents instead.